Tuesday, December 19, 2006

Ricotta, spinach and prosciutto ravioli adapted from Giada DeLaurentiis


In an unusual (in a good way) turn of events, R was inspired to cook dinner this weekend. He watched a Giada DeLaurentiis Everyday Italian episode on the Food Network and decide to try his hand at ricotta, spinach and prosciutto ravioli; not an easy choice for a first meal! It was a huge treat and turned out great (albeit not without much stress and angst emanating from the kitchen). He even adapted the original recipe to substitute an olive oil sauce for an unhealthy butter sauce and added toasted pine nuts for extra flavor.

Ricotta, spinach and prosciutto ravioli adapted from Giada DeLaurentiis

1 (15-ounce) container whole milk ricotta cheese
1 (10-ounce) package frozen chopped spinach, thawed, squeezed dry
4 ounces thinly sliced prosciutto, chopped
2 large egg yolks
3/4 teaspoon salt
1/2 teaspoon freshly ground black pepper
48 wonton wrappers
1/2 cup olive oil
1 1/2 teaspoons dried oregano
Freshly grated pecorino

Whisk the ricotta, spinach, prosciutto, egg yolks, salt, and pepper in a medium bowl to blend.

Place 1 tablespoon of the ricotta filling in the center of a wonton wrapper. Brush the edge of the wrapper lightly with water. Fold the wrapper in half, enclosing the filling completely and forming a triangle. Pinch the edges to seal. Transfer the ravioli to baking sheets. Repeat with the remaining filling and wrappers. (Can be prepared up to 2 hours ahead; cover and refrigerate.)


Heat the olive oil in a heavy small skillet over medium heat. Add the oregano and stir 1 minute. Season, to taste, with salt and pepper. Remove from the heat.

Working in batches, cook the ravioli in a large sauté pan of boiling salted water until just tender, stirring occasionally, about 4 minutes per batch. Transfer the ravioli to a large shallow bowl.

In a small skillet, toast the pine nuts until golden brown and fragrant.

Pour the oregano olive oil over the ravioli and toss gently to coat. Sprinkle the pecorino and pine nuts over the ravioli and serve.

Tuesday, December 12, 2006

Double chocolate espresso cookies - thick and chewy

“A” had a cookie swap last weekend. She invited a bunch of people over for soup and a chat and asked everyone to bring a batch of cookies. At the end of the get-together, everyone packed up an assortment of the cookies. A very cute idea!

I'm not much of a cookie maker; I'm much more of a cake baker. I love a classic chocolate chip but I was sure someone else would cover that territory. Instead, I revisited a few recipes I've used lately and combined them to create thick and chewy double chocolate espresso cookies using both white and semi-sweet chocolate chips.

I love a good thick cookie and somehow my cookies often turn out fairly skinny. I've read various articles about the science of cookie making and how to create thicker vs. thinner cookies (and chewier vs. crispier cookies) with a dizzying array of conflicting advice (all this in and of itself worthy of investigation in a post!). The advice involves creaming the butter and sugar longer or using melted vs. room temperature butter, chilling the dough, using more vs. less dough, letting cookies cool on cookie sheets vs. transferring them to a rack, etc.,

I checked Cooks Illustrated's The New Best Recipe because I was sure they'd have a reliable basic chocolate chip cookie recipe for thick and chewy cookies and then I decided to pump up the flavor by decreasing the flour and adding cocoa powder to make a chocolaty cookie and adding some espresso powder. I used white chocolate chips in half of the dough and semi-sweet chips in the other half to create some variety. The most interesting part of the Cook's Illustrated version was the way they suggested creating the dough balls. The result was a very irregular, large, thick, artisanal looking cookie which was just what I was after!

S's double chocolate espresso cookies (adapted from Cook's Illustrated's Thick and Chewy Chocolate Chip Cookies)

Makes 15-18 cookies

1 3/4 cups plus 2 tablespoons all-purpose flour
2 tablespoons espresso powder (finely ground espresso bean - not instant)
1/2 cup good unsweetened cocoa powder (I used Scharffen Berger)
1/2 teaspoon baking soda
1/2 teaspoon salt
12 tablespoons (1 1/2 sticks) unsalted butter, melted and cooled until warm
1 cup light or dark brown sugar, packed
1/2 cup granulated sugar
1 large egg plus 1 egg yolk
2 teaspoons vanilla extract
1-1 1/2 cups chocolate chips (semi-sweet and / or white chocolate)

Adjust oven racks to upper and lower-middle positions and heat oven to 325 degrees. Line two large cookie sheets with parchment paper or a silpat liner

Whisk flour, cocoa, baking soda, espresso powder and salt together in medium bowl; set aside

Mix butter and sugars together until thoroughly blended. Beat in egg, yolk, and vanilla until combined. Add dry ingredients and beat at low speed until just combined. Stir in chips to taste.

Roll 1/4 cup dough into ball. Holding dough ball in fingertips of both hands, pull into two equal halves. Rotate halves 90 degrees and, with jagged surfaces facing up, join halves together at their base, again forming a single ball, being careful not to smooth dough's uneven surface. Placed formed dough balls onto cookie sheet, leaving 2 1/2 inches between each ball.

Bake, reversing positions of sheet halfway through (from top to bottom and front to back) until cookies start to harden at edges yet centers are still soft and puffy, 15 to 18 minutes. Cool cookies on sheets. When cooled, peel cookies from parchment.

Tuesday, November 28, 2006

Thanksgiving favorite?

Ok - no more turkey or Thanksgiving fare until next year please (although it was great while it lasted). R, the doggie and I have had it with turkey for now.

Instead of posting a recipe this week, I thought I'd turn it over to you: what was your favorite holiday recipe? Please do share – I’d love to hear from you!

Tuesday, November 21, 2006

Cranberry orange relish


I'm hosting Thanksgiving this year. I've been getting organized for the big day: collecting recipes, shopping and slowly preparing dishes which can be made in advance. I'm making some things which look really interesting and which I know will be great, and others which I, well, hate but am making in the spirit of Thanksgiving. Firmly in the hate camp is cranberry sauce. I hate the gelatinous sugary mush that does a complete disservice to the interesting, very American berry.

I decided to be a good sport and make a couple varieties. The first one was made last night: a cranberry marmalade with diced orange (skin, pith and all). It turned out gelatinous and too sweet. If I were to make it again I'd halve the sugar. But someone's bound to like it so I'll stay the course. The next one I made tonight. It's a cranberry-orange relish that caught my eye because of the untraditional ingredients and preparation. Interestingly it's no-cook and includes jalapeno pepper which gives it an unexpected kick. The original recipe called for a finish of mint leaves and pecans but it is wonderfully interesting and uncomplicated without so I skipped that portion of the recipe. I also halved the sugar having learned my lesson. The result was fantastic – a true service to the cranberry and break from the dreaded jiggling jelly. I even think this one can get away with being served on another day of the year!

Recipe adapted from Martha Stewart, 1995, go figure!

Cranberry Orange Relish
Makes ~2.5 cups

2 cups fresh or defrosted frozen cranberries
1/4 cup diced red onion
1 large jalapeño pepper, seeded and finely chopped
2 tablespoons fresh lime juice
2 blood oranges or navel oranges, peeled, sectioned, and cut into 1/4-inch pieces, juices reserved 2 teaspoons fresh grated ginger
1/4 cup sugar
2 stalks celery, peeled to remove strings, cut in 1/4-inch dice

Place cranberries in food processor, and pulse to chop coarsely, about five pulses. Transfer to a medium bowl.

Add onion, jalapeño, lime juice, orange sections and juice, ginger, sugar, and celery; mix gently. Refrigerate for at least 1 hour and up to 2 days.

Sunday, October 29, 2006

Potato, quinoa, and cumin hash browns


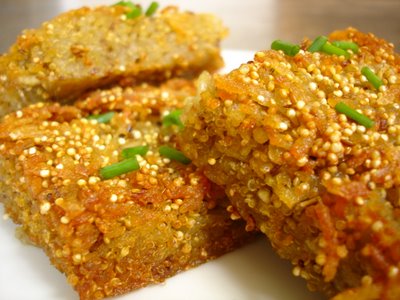
I decided to check out the new Chow foodie site. It was recently bought by CNET it is chock full of great content: I wish I created it myself! It has some terrific recipes in addition to cookbook and product reviews and instructional videos / content. My eye fell on a recipe for potato, quinoa and cumin hash browns which looked interesting and unusual. I happened to catch it just before a planned brunch for this weekend -- what a great time to try it out! I did everything up until the frying the day before and then just took the potatoes out of the refrigerator and cut and fried them morning of. This made what is a somewhat lengthy process (due to the 3 hours required to chill the potatoes before frying) more manageable. The hash browns turned out scrumptious and the toasted cumin added just the right twist to the old classic. I found the fact that they pre-baked and chilled the potatoes interesting – I assume that was to get them to hold a nice, compact, square shape, which they did.

Total Time: 1 hr 20 mins, plus chilling time (~3 hours additional)
Active Time: 50 mins
Makes: 12 hash browns

1 cup quinoa
3 tablespoons cumin, toasted
4 teaspoons kosher salt
2 1/2 pounds peeled Idaho potatoes
1 bunch chives, chopped

Heat oven to 400°F. Using a spice grinder or a mortar and pestle, coarsely grind together the quinoa, cumin, and salt; set aside.

Using a food processor with the grating attachment, grate the potatoes. Remove the grated potatoes from the processor and place them in a mixing bowl. (Alternatively, you can use a box grater.)

Let the grated potatoes rest for 5 minutes. Squeeze the liquid from the potatoes, one handful at a time, and place them in a separate, clean mixing bowl.

Add the ground quinoa, cumin, and salt mixture to the squeezed potatoes, and mix with your hands until well incorporated. Oil a 9-by-13-inch baking dish with olive oil and place a piece of parchment paper on the bottom, cut to fit exactly.

Pour the potato mixture into the oiled pan and pack it down (make sure to keep it a consistent thickness). Brush the top of the mixture with some more olive oil, and cover with another piece of parchment paper placed directly on the potatoes.

Place in the preheated oven and bake for 25 minutes. Remove from the oven and allow to cool to room temperature. Place in the refrigerator to cool completely, about 3 hours.

After 3 hours, remove from the refrigerator and slide a thin, sharp knife around the perimeter of the potatoes to loosen them from the pan. Flip the potatoes onto a cutting board. Trim off any crisp edges and cut into 12 equal pieces.

Fill a frying pan with 1/2 inch of a neutral oil (such as vegetable, canola, or peanut) and heat over medium heat. When the oil is hot (about 350°F), fry the hash browns until crisp and golden brown, about 3 to 5 minutes per side. Drain the finished hash browns on paper towels, season with salt, garnish with chopped chives, and serve.

Monday, October 23, 2006

(Vegetarian) chili

Fall's officially here. Time to transition to some warm, hearty comfort food. I finally gave in to my nagging desire to buy Jack Bishop's A Year in A Vegetarian Kitchen (see sidebar for Amazon link). It arrived on Saturday and I spent the morning flipping through it and drooling over what looks like some very nice recipes. It's organized by season which is always helpful in coordinating with fresh ingredient availability and state of mind. What caught my eye on this cold weekend was the hearty red been chili with ancho chiles and coffee. Coffee? Sounded interesting. His foreword touts the quick / easy nature of his recipes (he claims he cooks most nights and has dinner on the table in an hour or less -- including cleaning the kitchen first). I must have chosen the one recipe that takes closer to 4 hours to make. I guess if you count the number of days you can eat the leftovers you'd get to an hour average! Apart from the time, it was easy – and it turned out to be delicious. It had a pleasant spiciness due to the chiles and was rich and creamy due to the beans. I added a pound of white meat ground turkey, to make it extra hearty, which I sautéed with a little salt and pepper and a pinch of cumin (so much for vegetarian!). He suggests serving with either rice or corn bread (there's a very nice corn bread recipe in the book which I plan to try too).

Red Bean Chili with Ancho Chiles and Coffee

2 1/2 quarts water
1 pound dried dark red kidney beans, rinsed and picked over to remove any stones
2 bay leaves
Salt
4 dried ancho, quajillo, and / or pasilla chiles
1 1/2 cups boiling water
3 tablespoons canola oil
2 medium onions, finely chopped
6 medium garlic cloves, minced
1 tablespoon ground cumin
1/2 cup brewed coffee
1 14.5 oz can diced tomatoes
1/4 cup chopped fresh cilantro leaves
Hot sauce, such as Tabasco (optional)

Place the water, beans, and bay leaves in a large saucepan. Bring to a boil, reduce the heat, and simmer for 30 minutes. Add 1 teaspoon salt and continue to simmer until the beans are beginning to soften slightly but are not yet completely tender, about 45 minutes. Discard the bay leaves, cover the saucepan, and set the beans aside in the cooking liquid.

Snap off the stems of the chiles and discard. Shake out as many seeds as possible and discard. Place the chiles in a medium bowl and cover them with the boiling water. Soak until the chiles are soft about 15 minutes. Lift the chiles from the water and transfer them to a blender, reserving with water. Pour the water through a strainer into a measuring cup to catch the remaining seeds. Discard the seeds. Puree the chiles, adding as much of the chile soaking liquid as necessary to make a thick but smooth puree (You will probably need about ¼ cup soaking liquid; reserve the rest). This step can be done as you are cooking the beans to save time.

Heat oil in a Dutch oven over medium heat until shimmering. Add the onions and ½ teaspoon salt and cook, stirring often, until golden and soft, 8 to 10 minutes. Stir in the garlic and cumin and cook until aromatic, about 2 minutes. Scrape the chile puree from the blender jar into the pot and cook until very fragrant, about 3 minutes.

Add the remaining chile soaking liquid, coffee, tomatoes, and beans and their cooking liquid to the Dutch oven. Bring to a boil, reduce the heat, and simmer, stirring occasionally, until the beans are tender and the chili is thick, 1 to 1 ½ hours. (The time will very depending on the freshness of the beans and how quickly the liquid cooks off. You can’t really overcook chili. If your beans aren’t as creamy as you would like but the pot is getting dry, just add some water and keep cooking.) Stir in the cilantro and add salt to taste and hot sauce if using. Serve or refrigerate in an airtight container for several days.

Variation: Add 1 lb lean ground turkey (browned with salt and pepper and a pinch of cumin and add to the chili ~30 minutes before finished)

Tuesday, October 10, 2006

All about eggs

I’ve been rediscovering eggs lately. They are such a perfect source of quick, inexpensive protein. I’ve become a bit of an organic / farm fresh zealot. The fresh eggs available at the farmer’s market taste so much better than the store bought variety that it’s worth waiting to stock up. This all got me thinking about eggs – what makes eggs different colors? How can you tell a fresh egg from an old-ish egg? What is that slimy membrane-y thing you see in eggs? What’s that red dot you sometimes find? I thought I’d compile all my learnings in a post. I’ve used four main sources for this: Wikipedia, The American Egg Board, Martha Stewart (from which most of the anatomy and the preparation / cooking information is drawn) and Delicious Organics (an online retailer of organic produce). In most cases I’ve taken the information from these sources verbatim, meshing together some facts from different sites and adding a few of my own. I found all of the information across sources to be consistent. If you have any additional thoughts you’d like to add or any corrections to point out, please do post a comment!


Freshness

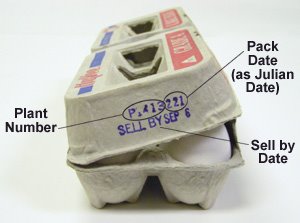
  • Egg cartons from USDA-inspected plants must display a Julian date--the date the eggs were packed (this date starts with January 1 as number 1 and ends with December 31 as 365). Although not required, they may also carry an expiration date beyond which the eggs should not be sold. In USDA-inspected plants, this date cannot exceed 30 days after the pack date. It may be less through choice of the packer or quantity purchaser such as your local supermarket chain. Plants not under USDA inspection are governed by laws of their states.
  • As an egg ages, the porous shell will allow more and more air to enter into the egg. A fresh egg will sink to the bottom of a glass of water: an older egg will become increasingly buoyant.
  • The freshest eggs you can find are the best for frying and poaching, as they are the firmest and will hold their shape well. Eggs that are ten days old and older are actually better for certain purposes, such as whipping and beating for recipes, and for hard-boiling, since a slightly older egg is easier to peel once it is cooked.

(photo above from The University of Nebraska Cooperative Extension)

Anatomy

  • Yolk: The yolk makes up approximately one third of the weight of an egg and contains all of the fat and just under half the protein. It is extremely vitamin-rich, containing every vitamin except C; it’s also one of the few natural food sources of vitamin D. The yolk also contains more phosphorus, manganese, iron, iodine, copper, and calcium than the white, and it contains all of the zinc. The yolk of a Large egg contains about 59 calories. The yolk acts as an emulsifier in recipes, allowing combinations of ingredients—such as oil and water—that normally don’t mix. A fresh yolk will be firm and will stand tall when the egg is broken. The color of the yolk is largely determined by what the hen is fed.
  • Albumen (egg white): The albumen makes up the remaining two-thirds of an egg’s liquid weight, and is itself approximately 87 percent water. It contains more than half of the protein of the egg, is fat-free, and is rich is niacin, riboflavin, chlorine, magnesium, potassium, sodium, and sulfur. The albumen directly surrounding the yolk is called the “thick white,” and is firmer and thicker than the outer layer. This is especially true in a very fresh egg; as an egg ages, the entire white thins and becomes more watery. A cloudy egg white often seen in very fresh eggs is caused by the harmless presence of carbon dioxide, which escapes as the egg ages.
  • Chalaza: These small, white, stringy pieces act as an anchor between the yolk and the thick white, and are most apparent in fresh eggs. They are harmless and needn’t be removed (they are neither imperfections nor beginning embryos, contrary to popular belief), though they can be strained away for aesthetic purposes if desired. The more prominent the chalazae, the fresher the egg. Chalazae do not interfere with the cooking or beating of the white and need not be removed, although some cooks like to strain them from stirred custard.
  • Air cell: A pocket of air that forms between the wide end of the eggshell and the albumen and increases in size as an egg ages. A very fresh egg will have little or no air cell.

Grading of Eggs

  • The United States Department of Agriculture (USDA) has established a grading system for eggs sold in the shell. It is not mandatory that eggs be graded by this system to be sold, but only those that meet the standards will carry the USDA grade shield on the package. In order of quality, USDA grades are AA, A, and B. Grades are not determined by size or nutritional value, but rather by age, shape and appearance of the shell, yolk, and albumen, and size and location of the air cell.
  • An egg graded AA will have a firm yolk and a thick albumen, a small air cell, and will generally not be more than 10 days old. Grade A eggs can be ten days to several weeks old, and will have a fairly firm, upstanding yolk and a good proportion of thick white to thin. Both AA and A must have oval-shaped shells with one larger end; a misshapen egg will automatically be grade B. A grade B egg is more watery than the higher grades, and will have a larger air cell. B eggs are rarely sold in grocery stores and generally go straight to manufacturers of egg products.

Blood Spots

  • Blood spots are occasionally found on an egg yolk. Contrary to popular opinion, these tiny spots do not indicate a fertilized egg. Rather, they are caused by the rupture of a blood vessel on the yolk surface during formation of the egg or by a similar accident in the wall of the oviduct. Less than 1% of all eggs produced have blood spots.
  • Mass candling methods reveal most eggs with blood spots and those eggs are removed but, even with electronic spotters, it is impossible to catch all of them. As an egg ages, the yolk takes up water from the albumen to dilute the blood spot so, in actuality, a blood spot indicates that the egg is fresh. Both chemically and nutritionally, these eggs are fit to eat. The spot can be removed with the tip of a knife, if you wish.
  • Eggs with blood spots are not kosher. This is because blood spots can also occur due to fertilization. Of course, most hens nowadays are not allowed anywhere near a rooster so fertilization is an impossibility in today's eggs, but religion dictates that we toss the egg with the blood spot. The laws of Kashrut do not dictate white eggs over brown or other color eggs, just that it not be a fertilized egg. Some people believe that there are more blood spots in brown eggs than white eggs because they mistakenly think that a naturally occurring brown coloration in the brown egg is a blood spot and it is not. The laws of Kashrut are clear that it is the red blood spot that is not allowed for fear of fertilization and that brown spots can be ignored.

Appearance

  • If a boiled egg is overcooked, a greenish ring sometimes appears around egg yolk. This is a manifestation of the iron and sulfur compounds in the egg. It can also occur when there is an abundance of iron in the cooking water. The green ring does not affect the egg's taste; overcooking, however, harms the quality of the protein.
  • Egg shell color is caused by pigment deposition during egg formation in the oviduct and can vary according to breed, from the more common white or brown to pink or speckled blue-green. Aracona chickens, for example, lay a lovely green shaded egg. Breeds with white feathers and ear lobes lay white eggs; breeds with red feathers and ear lobes lay brown eggs. White eggs are most in demand among American buyers. In some parts of the country, however, particularly in New England, brown shells are preferred. The Rhode Island Red, New Hampshire and Plymouth Rock are breeds that lay brown eggs. Since brown-egg layers are slightly larger birds and require more food, brown eggs are usually more expensive than white. Egg color is simply an aesthetic preference.
  • Yolk color is dependent on the diet of the hen; if the diet contains yellow/orange plant pigments known as xanthophylls, then they are deposited in the yolk, coloring it. A colorless diet can produce an almost colorless yolk. Farmers may enhance yolk color with artificial pigments, but in most locations, this activity is forbidden
  • Size is actually determined by the age of a hen. The older the hen, the larger the egg.
  • Double yolks come from the same hens making the XL eggs. A large egg should weigh no less than two ounces, whereas a jumbo will weigh about two and three-quarter ounces, and a small about one and one-half ounces.

Preparing and cooking

  • Separating eggs: Even a drop of fat will decrease volume, so be careful not to let any yolk fall into the bowl. Eggs are easiest to separate when they are cold, but bring the separated egg whites to room temperature before beating them.
  • Whipping egg whites: Use a stainless-steel and copper bowls to yield the best results. Avoid plastic, which can retain traces of fat even when washed.
  • Boiling eggs: Despite the name, boiled eggs should not be boiled throughout the cooking process—a method that yields a rubbery result—but instead should be brought to a boil and then removed from the heat.

Instructions for the Perfect boiled egg:

  • Place eggs in a single layer in a saucepan, and cover with 1 inch of cold water. Bring to a boil, cover, and immediately remove from heat. Let stand approximately 1 1/2 to 2 minutes for soft-boiled, 2 to 2 1/2 minutes for medium-boiled, and 12 to 13 minutes for hard-boiled. Remove eggs from water.
  • Soft- and medium-boiled eggs should be served immediately in egg cups—perfect for cracking and scooping the egg right from the shell.
  • Hard-boiled eggs should be removed from the pot and plunged into a bowl of ice water. This prevents the yolk from discoloring due to overcooking and facilitates peeling. Let stand for 2 minutes, then crack by gently pressing the egg against a hard surface. Peel under cold running water. Serve.

Storing

  • For best results, store eggs in the container they are sold in, on a refrigerator shelf rather than in an egg compartment on the door, which is subject to frequent temperature changes as the door opens and closes.
  • Inappropriate temperature and humidity will age an egg. (A week-old egg can actually be fresher than a day-old egg.) In the U.S. eggs are refrigerated but in other parts of the world they are not. They will keep fresh out of the refrigerator if never placed in cold. Once they are refrigerated, they must always be refrigerated to maintain freshness.
  • Refrigerate unbeaten whites, tightly covered for up to four days, or freeze (in ice-cube trays, then transfer to a freezer bag), up to six months (thaw overnight in the refrigerator).

Other

  • Recently, chicken eggs that are especially high in Omega 3 fatty acids have come on the market. These eggs are made by feeding laying hens a diet containing polyunsaturated fats and kelp meal.
  • If a raw egg is spun, abruptly stopped and then quickly released, it will start to spin again as the liquid inside continues to rotate. This technique can be used to reliably determine whether an egg is raw or already boiled — a solid egg will remain stationary once halted. Additionally, if a cooked egg and a raw egg are spun with the same force, the cooked egg will spin much faster. Another way of determining if an egg is raw or already boiled is to spin it quickly. An already boiled egg will spin into an upright position after a few seconds, but the raw egg will continue to spin on its wide side.

    Wednesday, October 04, 2006

    Apricot jam


    Ok. I’m back. Time to resume non-canine activities. I was thinking about which recipe to post this week and thought I’d post one that you can enjoy for a long time . . . jam!

    I took a canning class at the Culinary Institute recently. The average age of the class was rather high – I guess canning is an old fashioned and somewhat quaint pursuit. I have always been interested in canning – more for the endless gift-giving opportunities it affords than for preserving out-of-season items, but have not tried it for fear of poisoning my gift recipients. It seems improper canning could easily result in botulism and lead to certain death – oh my! So I took a class to learn proper methods and handling and am now cautiously optimistic about my ability to impart joy without harm.

    I always thought canning required a lot of equipment and space, but actually you need relatively few items – at the most basic level, proper canning jars and lids and a pot large enough to fill with enough water to cover the jars by several inches. We concentrated on canning high-acid foods (pH value 4.6 or lower) which require heat processing to 212 degrees Fahrenheit and can therefore be processed using a simple boiling water canner for a specified period of time. Low acid foods must be processed at temperatures of 240 degrees Fahrenheit to destroy harmful bacteria and follow an entirely different process which is more involved and was not covered in our class. High-acid foods include fruits, jams, jellies, pickles, relishes, chutneys, vinegars, etc.

    Canning requires precisely following a strict set of directions that cannot be altered by the novice. This means adhering to the exact sugar content and jar size specified in the recipe as both are exactly related to the processing time specified.

    I recently read a great blog post on the process on Andrea’s Recipe Box which I will reference so as not to repeat the same information available there.

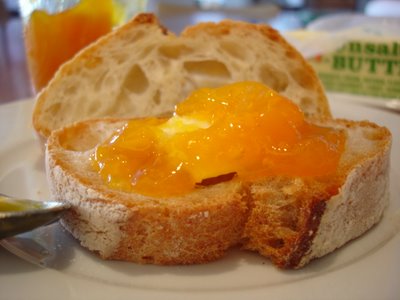
    My favorite recipe was for Apricot Jam which is my all-time favorite jam. I’m excited to buy Ball’s Blue Book of Canning (see my sidebar for an Amazon link) to explore more great recipes and ideas. Even if you don’t want to venture into canning, you can obviously make the jam and refrigerate it for a few weeks. If you decide to can, your jam will keep for a year in a dark, cool place.

    Apricot Jam
    (Makes about 4 pints)

    2 quarts pitted and crushed apricots (no need to chop – large pieces will reduce to a nice size and provide great texture)
    2 cups dried apricots, roughly chopped
    ¼ cup lemon juice
    2 cups granulated sugar

    Combine fresh apricots, dried apricots and lemon juice in a large pot over medium heat. Gradually stir in sugar and increase heat to high, stirring frequently until thick. Ladle hot apricot jam into hot jars, leaving ¼ inch headspace. Remove air bubbles, adjust lids and process 15 minutes in boiling water canner.

    Wednesday, September 27, 2006

    No recipe this week

    No recipe this week -- and this is why -- a new puppy! She's adorable and running us ragged. So take the opportunity to peruse the archives this week and try out some things. Please also take the opportunity to post some comments (encouragement, feedback, love and kisses) – I feel like I’m writing into a void without them!

    ‘Til next week. . .

    Tuesday, September 19, 2006

    Linguine with clams


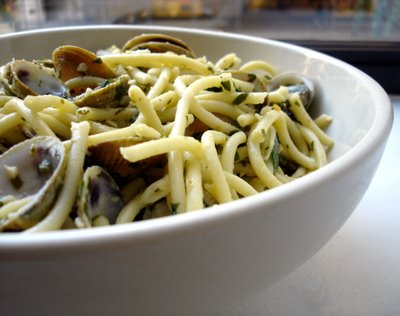
    This photo certainly does not do justice to this dish, which is my all-time favorite. I tried. I photoshopped. No dice. You'll have to use a little imagination.

    I'm not sure when it happened (or why) but linguine vongole became my favorite comfort food some time ago and I cannot resist ordering it whenever I see it on the menu. This means that I've been to many great Italian restaurants and have deprived myself of venturing further than this dish. I simply must have it. I love the garlicky flavor and the sweet little clams. I love digging out the little clams and the satisfying clank of the shells on the plate as the remnants pile up. I've tried it at home to satisfy a craving a number of times and Martha's recipe hits the spot best. It's quick and easy. The only time consuming part is scrubbing the cockles to remove sand and grime. I made it last week and we slurped it up with a crusty whole wheat baguette. Then we ate left-overs standing in the kitchen the next day and it was just as good (if not better)!

    Serves 4 to 6

    Coarse salt and freshly ground black pepper
    1 pound linguine
    1/4 cup extra-virgin olive oil
    4 cloves garlic, finely chopped
    1/2 teaspoon crushed red pepper flakes
    3/4 cup loosely packed flat-leaf parsley leaves, coarsely chopped
    Zest of 1 lemon
    1/4 cup dry white wine
    3 pounds Manila clams or cockles, scrubbed and rinsed
    2 tablespoons unsalted butter

    Bring a large pot of water to a boil. Add salt and pasta, and cook according to package instructions until al dente. Drain, reserving 1/2 cup cooking water.

    Heat olive oil in a large skillet over medium heat. Add garlic and red pepper flakes, and cook, stirring, for 30 seconds; do not let garlic brown. Stir in parsley, zest, 1/8 teaspoon salt, and a pinch of black pepper; cook for 30 seconds. Add wine, and simmer for 1 minute. Add clams; increase heat to medium-high, and cook, covered, until clams begin to open, 3 to 4 minutes. Stir in butter until incorporated. Add pasta to skillet, and toss to coat, adding reserved cooking water a tablespoon at a time to loosen, if desired. Transfer to a large serving bowl, and serve.

    Tuesday, September 12, 2006

    Spinach-couscous salad


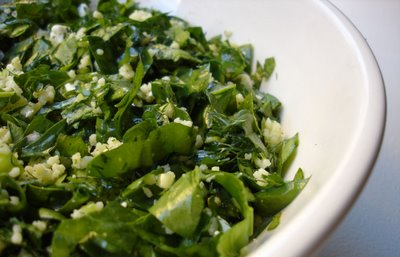
    My aunt always buys a terrific spinach couscous salad from a deli on the upper east side that we all love and devour. Time to figure out how to make it at home! It's extremely simple to make and is the perfect summer lunch. I tried a few times to successfully reverse-engineer it and I think I've got it!

    1 1/4 cups cooked couscous (cooked in water, not chicken stock which can make it too chicken-y)
    4 cups baby spinach, de-stemmed, and any tough veins removed
    4 tbs minced green onion (about 3)
    4 tbs chopped dill (a surprise ingredient)
    Juice from 1/2 lemon
    1/2 cup French feta, cut or crumbled into small cubes
    ~1-2 tbs good olive oil
    Salt and fresh-ground pepper to taste (I'm generous with both)

    Allow couscous to cool. Chiffonade spinach and combine all ingredients. This version, which we like, is more spinach than couscous but adjust quantities to your liking. I like to drizzle a little olive oil and sprinkle some additional salt on mine before I eat it but it's also good just as it is.

    Tuesday, September 05, 2006

    Versatile banana yogurt muffins


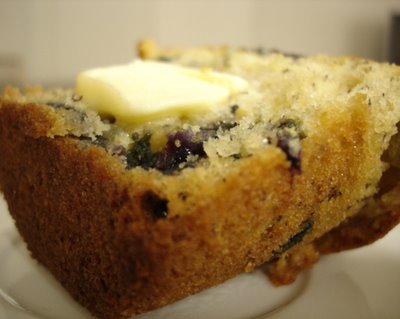
    My friend Alison, who has a treasure trove of great recipes, sent me her favorite muffin recipe which I tried this weekend and loved. It's so easy and can be reasonably healthy if you swap the oil for applesauce. She loves raspberry chocolate chip, but R and I picked fresh blueberries recently and I decided to use them in these muffins -- delicious! (note: I added a pinch of cinnamon to the batter and brushed the tops lightly with cold water and dusted with granulated sugar for a pretty finish).

    I'll post her original recipe and comments:

    *************

    With blueberries in season, this is a tasty recipe for brunch or just week day mobile breakfast. Strawberries seemed like a good idea but result was too soggy. My favorite combination is raspberry chocolate chip. Though the batter includes bananas, the flavor is subtle.

    Versatile Banana Yogurt Muffin Recipe

    Preheat oven to 350 degrees

    Mix together ½ cup plain or vanilla yogurt, ½ cup oil, 1 cup sugar. Add 1 cup mashed bananas (about 2 ripe bananas, mash by hand), 2 eggs, 1 tsp vanilla. Mix until fairly smooth.

    In a separate bowl, mix 2 cups flour, 1 tsp baking soda and ½ tsp salt.

    Add dry to wet, mix until incorporated. Then add 1 heaping cup fruit, nuts or chocolate chips.

    Pour batter into muffin tins (I use Texas-size pan to make six large muffins but you can make 12 regular size muffins) and bake 40-45 minutes, until top is golden brown.

    Note: Can make muffins with blueberries (fresh work better than frozen), chopped pecans, chopped walnuts, raisins (dark and light), and chocolate chips. Topping of cinnamon sugar is nice too, can swirl cinnamon sugar in the middle of the muffin as well. When adding raisins or nuts can add ½ tsp cinnamon to the dry ingredients. To make a non fat version, substitute ½ cup applesauce instead of the oil.

    Tuesday, August 29, 2006

    "Real" quiche


    I have tagged several classic French recipes in my Bouchon cookbook that I want to try. One of them is Beef Bourguignon, which looks so complicated and time-consuming that I've delayed tackling it for the past six months. Now that it’s August, I have an excuse to prolong the delay since it’s not exactly hearty stew weather. Another of the recipes is for a classic French quiche. Well quiche isn’t too hard, right?

    That's what I thought as I pulled ingredients together for quiche. I started making it in the early afternoon thinking that, served with a great green salad, it would make the perfect light summer dinner. I did not bother to read the entire recipe carefully before I started. I mean, it’s quiche -- how hard can it be? Wrong! This was the most time-consuming and scientifically precise recipe for quiche that I have ever seen. The process involved many steps of forming, blind-baking and cooling the shell, cooking, rendering and whipping the various fillings, and slow-cooking the quiche to create a creamy texture.

    There are apparently a few keys to making the perfect, creamy quiche:

    1) Using a 9-inch wide by 2-inch high ring mold and parchment paper vs. a classic pan to cook the quiche so that the bottom crust remains crusty and not soggy;

    2) Whipping the custard mixture so that it’s frothy both to create a light texture and help suspend the fillings within the quiche;

    3) Making sure the custard and all of the ingredients go into the oven warm so that the custard starts cooking as soon as it’s in the oven; and

    4) Cooking it in an oven heated to no higher and no lower than 325 degrees so that the quiche is hot enough to prevent the custard from saturating the crust and making it soggy, and cool enough so that it cooks slowly, producing a creamy texture

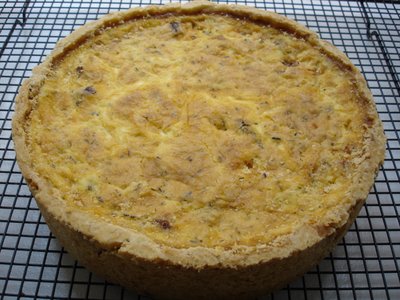
    Phew! Suffice it to say, dinner ended up being 24 hours later due to all of the steps involved, but boy was it worth it! The result was a true French quiche with a creamy texture and full flavor. I made Quiche Lorraine which was sumptuous given the slab bacon, comté cheese and “onion confit” (onions cooked for several hours with butter and a bouquet garni of thyme, parsley, bay leaves and black peppercorns). I’ll post the recipe for a basic quiche since it’s considerably shorter. If you’d like the specifics for the Quiche Lorraine, feel free to post a comment and I’ll pass on the (substantial) information.

    For the dough:

    Use the basic chilled pâte brisée recipe from the rustic fig tart post (doubled in quantity).

    For the shell:

    Roll the dough into a circle 14 inches in diameter and 3/16 inch thick. Re-chill the dough if it has become soft after rolling out.

    Lightly brush the inside of a 9-inch wide by 2-inch high ring mold with canola oil and place it onto a parchment-lined baking sheet.

    Carefully lift the dough into the ring (you can fold the dough over twice and then unfold it on top of the ring or use a rolling pin to roll-up, lift and then unroll onto the ring), center it on the ring and then lower the dough into the ring, pressing it gently against the sides and into the bottom corners of the ring. Trim any dough that extends more than an inch over the sides of the mold and reserve the scraps. Fold the excess dough over against the outside of the ring (to prevent it from shrinking down the sides as it bakes – the excess dough will be removed after the quiche is baked). Carefully check for any cracks or holes in the dough, and patch with the reserved dough as necessary. Place in the refrigerator or freezer for at least 20 minutes to resolidify the butter. Reserve the remaining dough scraps.

    Put a rack set in the middle of the oven and preheat the oven to 375.

    Line the quiche shell with a 16-inch round of parchment. Fill the shell with pie weights or dried beans, gently guiding the weights into the corners of the shell and filling the shell completely.

    Bake the shell for 35 to 45 minutes or until the edges of the dough are lightly browned but the bottom is still light in color.

    Carefully remove the parchment and weights. Check the dough for any new cracks for holes and patch with the thin pieces of reserved dough if necessary. Return the shell to the oven for another 15 to 20 minutes, or until the bottom is a rich golden brown. Remove from the oven and allow the shell to cool completely on the baking sheet. Once again, check the dough for any cracks or holes or and patch if necessary before filling the quiche batter. Turn the oven down to 325 degrees.

    For the batter:

    2 cups milk
    2 cups heavy cream
    6 large eggs
    1 tablespoon kosher salt
    ¼ teaspoons freshly ground white pepper
    6 gratings fresh nutmeg

    Combine the milk and cream in a large saucepan and heat over medium heat until scalded (meaning a skin begins to form on the surface). Remove from the heat and let cool for 15 minutes before continuing.

    Put 3 eggs, half the milk and cream mixture, 1 ½ teaspoons salt, 1/8 teaspoon white pepper, and 3 gratings of nutmeg in a blender and blend on low speed for a few seconds to combine the ingredients. Increase the speed to high and blend for 30 seconds to a minute, or until the batter is light and foamy. This is the first layer of the quiche: once you have assembled it, add the remaining ingredients to the blender and repeat the process to complete the quiche.

    There may be a little excess batter depending on how much air is incorporated into the batter as it is blended. The quiche may sink slightly as it bakes. So check it after about 20 minutes and if there is room, add a bit more of the batter to the top.

    Bake at 325 for approximately 1 ½ to 1 ¾ hours, or until the top of the quiche is browned and the custard is set when the pan is jiggled. The custard should jiggle uniformly throughout vs. jiggle more quickly in the center. Be aware that the quiche will continue to cook once out of the oven, and do not overcook.

    The quiche needs to be thoroughly chilled before it’s cut, so make your quiche at least a day and up to three days before serving it. Trim any excess crust that extends above the custard using a serrated knife. Cut individual slices using a serrated knife for the side crust and a slicing knife through the custard and bottom crust and reheat in a 375 degree oven (for 15 minutes or until hot throughout) on a parchment-lined baking sheet before serving.

    Tuesday, August 22, 2006

    Indian food dinner (part 2 of 2)


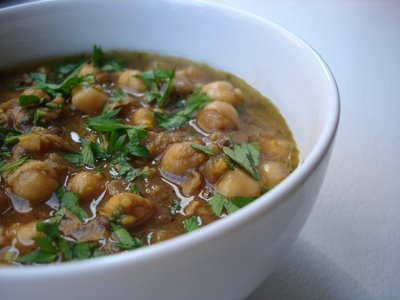
    As promised, this is the continuation of last week's Indian food dinner post -- this time with the recipes for the side dishes, stewed chickpeas and "beer rice." Bon appétit and please do let me know how it goes!

    Stewed chickpeas (Chana)

    3 tbs oil
    2 cans of chickpeas drained (or 3-4 cups dry chickpeas, soaked overnight)
    1 onion, chopped
    3 tsp ginger, chopped
    1 tsp cumin seeds
    1/2 tsp of turmeric
    pinch of asafoetida
    2 tsp of ground coriander
    1 tsp coriander seeds
    4 cups water
    2 tsp tamarind paste (or to taste)
    Red chili powder and salt to taste

    Heat oil in pan, add the cumin and coriander seeds and the asafoetida. Wait a few seconds until the cumin seeds "crackle", then add the onion. Sauté until the onion is brown. Add the turmeric and ginger, then all the remaining spices. Add the chickpeas and water. Bring to boil and add tamarind paste (stir it in to dissolve). Cook 30-40 minutes until tender. Add salt to taste. Garnish with cilantro.

    Note: Adjust seasonings to your taste -- the seasonings above will result in a mild version. To thicken the sauce (if desired), crush some chickpeas with a woooden spoon against the side of your pot toward the end of the cooking time and continue to cook to thicken.


    "Beer rice"

    2 cups Basmati rice
    1 teaspoon cumin seeds
    1/2 - 1 bunch fresh cilantro (coriander) - chopped coarsely
    1 bottle beer - most lagers / ales work well
    2-3 tbs oil

    Heat the oil and add the cumin seeds - wait for them to "crackle". Add the rice and lightly move the grains around to coat them with oil. Wait until they become chalky. Mix the cilantro in with the rice. Add the beer and enough water for there to be 4 cups of liquid in the pot (should be about ~2 1/2 cups of water in addition to the beer). Add salt to taste. Bring the liquid to a boil, lower the heat, cover the pot and let the rice cook for ~15 minutes. Turn off the heat and let it sit covered for an additional 5-7 minutes.

    Tuesday, August 15, 2006

    Indian food dinner (part 1 of 2)


    We had a HUGE treat last week. Friends of ours called to ask if we wanted to cook an impromptu meal together on Saturday night. I suggested we cook Indian food as they are experts on the subject and I appreciate Indian food but know nothing about cooking it. In no time at all my friend D, an enthusiastic cook, came up with a multi-course menu and we divided up a shopping list. We then met back at home where his wife and I dutifully followed all cutting, chopping and blending orders while he whipped around the kitchen turning our choppings into sumptuous fare. It was such a luxury to be treated to a home cooked meal (in our own home!) and to have no more responsibility than to mindlessly chop away while someone else worried about assembling the dishes. We had a wonderful meal of cold cucumber soup, beef curry, mustard shrimp and chickpeas served with Basmati rice infused with cilantro, and of all things, beer. The leftovers were even more magnificent the next day. I'm breaking this post into two to keep you in suspense -- check back next week for the chickpeas and rice.

    (Recipes courtesy of D & T)

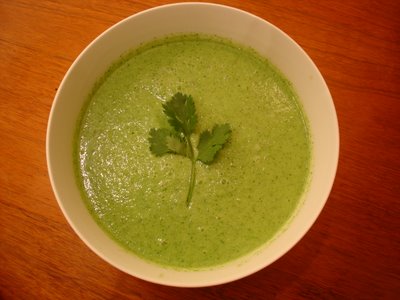
    Chilled cucumber soup

    2 English cucumbers, peeled
    3 cloves of garlic (note: 3 cloves will make a fairly garlicy soup (which we like). You might want to start with 1 clove and add more to suit your own taste)
    1 green chili
    2-3 tablespoons of extra virgin olive oil
    1 quart buttermilk (or plain yogurt)
    1/2 bunch coriander (cilantro) leaves
    Salt to taste
    Optional: ground roasted cumin

    Blend all ingredients together. Adjust the consistency of the soup by adding water as desired. Add olive oil. Chill in refrigerator and before serving garnish with roasted cumin and a sprig of coriander leaves (optional).


    Beef curry

    1 medium onion, chopped
    3 cloves garlic, crushed/chopped fine
    1 tablespoon ginger, chopped fine
    1.5 lb stew beef, cubed (or lamb or veal)
    1 can coconut milk
    4-5 whole cloves
    1-2 sticks of cinnamon (try to get Indian cinnamon if possible - less sweet than American)
    2-3 bay leaves
    ground cumin
    ground coriander
    pinch of red chili powder or more to taste
    dry mango powder ("amchur") or lemon juice to taste
    salt to taste

    Sauté the onion, garlic, ginger until golden brown and the oil separates. Add the beef cubes and brown. Add the spices and 1/2 the coconut milk and enough water or beef stock to cover the meat. If you have a pressure cooker, bring to pressure and cook for 1-1.5 hours. If not, braise on low heat for 3-4 hours until meat is tender. Add the remaining coconut milk and salt to taste.
    Variation: replace cumin and bay leaves with black mustard seeds and curry leaves. Fry the mustard seeds in a teaspoon of oil before adding to the pan.
    I am a Manhattan-based photographer specializing in two of the best things in life: food and children.

    I love the challenge and diversity of both subjects, but I most enjoy the pleasure my images -- whether mouth-watering shots of delicious dishes or tender portraits of newborn babies -- bring to my clients.

    I love the creative process of turning a concept into a reality. I typically do my own food and prop styling and love every part of a shoot, from talking to the client about their needs, to developing a vision for the shoot. I love finding the perfect props to support the vision, shopping for the best ingredients, and cooking, styling and shooting a dish in a way that best communicates the vision.

    My work can be seen regularly in The New York Times Dining Section, numerous cookbooks, magazines and in the marketing materials of many private clients.

    For more information about my food photography, please see www.sabrakrock.com. For additional information about kids photography, please see www.sabrakrockkids.com.

    Thursday, August 03, 2006

    Rustic fig tart


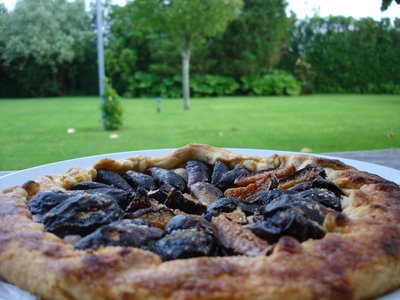
    I've been taking a pastry class at the Institute of Culinary Education which has inspired a lot of weekend pastry making. Pastry is the one major hole in my dessert repertoire; I can do cookies, cakes and cupcakes without issue but I've never mastered the art of pastry making so this is my chance. During the first session we learned two basic doughs which offer endless possibilities: pâte brisée, (a flaky dough), and pâte sucrée, a sweet and slightly dense pastry dough. The former is a little tricky for a few reasons: 1) it requires quick work to keep the dough from becoming warm, melting the butter and losing its eventual flakiness 2) it needs to be kneeded without overworking it lest it become tough and 3) it can’t be patched well and needs to be rolled out only once.

    There is so much gorgeous fruit in farmers markets now I was inspired to try a fig tart with beautiful fresh figs. I used my class dough recipe and some simple instructions for making a fig tart adapted from one of my favorite seasonal cookbooks.

    For the dough (makes 1 1-crust pie)

    1 ¼ cups (about 5 ½ ounces) all-purpose unbleached flour
    ¼ teaspoon salt
    1/8 teaspoon baking powder
    8 tablespoons (1 stick) cold unsalted butter
    2 to 3 tablespoons cold water (put ice cubes in glass of cold water to chill)

    For the filling

    6 tablespoons sugar or less if fruit is quite ripe
    1/5 lbs fresh figs

    To make the dough

    Combine flour, salt and baking powder in a medium mixing bowl and whisk to mix. Pour mixture onto a clean, smooth surface such as a stainless steel table. Cut butter into tablespoon-sized pieces and add to dry ingredients. Toss once or twice to coat pieces of butter. Use your hands to rub the butter into the dry ingredients by breaking it into tiny pieces, continuously pinching and squeezing it into the dry ingredients. Be careful to keep the mixture uniform by occasionally reaching down to the bottom of the mixture and mixing all the ingredients evenly together. Continue rubbing the butter into the dry ingredients until the pieces of butter are dime/nickel-sized. Create a well in the center of the dough, spoon 2 tablespoons of the water into the hole, and mix gently with your fingertips, gradually working the water into the dry ingredients. The mixture will crumbly in the beginning but should begin to come together into a ball. If the mixture still appears crumbly after working it, add the remaining water (plus more if needed after mixing together), 1 teaspoon at a time, until the dough holds together easily. (Note: too little water makes a flaky crust that will crack during rolling; too much water makes an elastic, bread-like crust that lacks flakiness. Do not over-work the dough or it will become tough.) When finished, you should have a ball of dough with small pieces of butter still visible in the mixture. Wrap dough in plastic wrap and press it into a 6 inch disk. Refrigerate until firm, or until you are ready to use it, at least 1 hour.

    To make the tart

    Clean and dry work surface. Dust lightly with flour. Wipe rolling pin clean. Dust lightly with flour. Pound dough with rolling pin in two directions so it begins to spread out then roll dough into a ~9 inch disk by rolling in one direction (away from you), turning dough 90 degrees and rolling away from you again. Repeat process until you have a 1/8 inch think disc, dusting more flour under dough and on rolling pin if it sticks.

    Trace a ~9 inch circle in dough using the bottom of a tart pan as a guide. Quarter figs through the stem or, if large, cut them in sixths. Set aside in a bowl. Just before you are ready to assemble galettes, sprinkle figs with 6 tablespoons of sugar and toss gently to distribute. Transfer dough to a heavy baking sheet. Arrange figs attractively on dough, leaving a 1 ½ inch edge all the way around. Fold the edge over to create a border making sure there are no cracks in the dough or the fruit juices will seep out during baking. Patch, if necessary, with bits of trimmed dough lightly moistened with cold water.

    Brush border with a little egg wash (1 yolk lightly beaten with a pinch of salt), then sprinkle the border generously with sugar. Bake at 425 degrees until crust is golden and fruit is bubbly, 22 to 25 minutes. Transfer to a rack and cool slightly before serving.

    Variations:
    Make several individual tarts instead of one large tart

    Tuesday, July 25, 2006

    Fruit pops


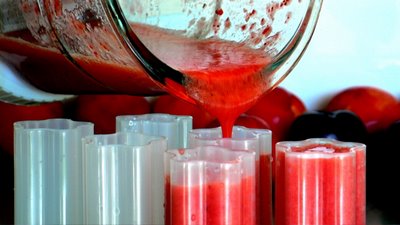
    Filling the molds with strawberry-lemon fruit mix

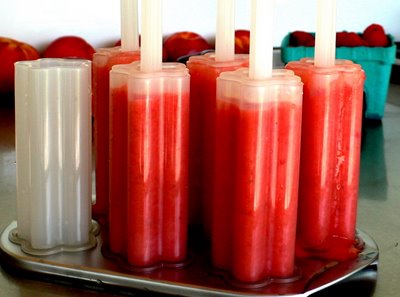
    Okay, so this isn't really a recipe since it is so simple but let's call it an idea / inspiration for these hot summer days. We had a 3-year-old over this weekend which motivated me to whip up some fruit pops (strawberry-lemon, raspberry-lime and banana). They are so easy I'm not going to write a formal recipe but rather list the ingredients and provide some guidance: fresh summer fruit (whatever your fancy), water, sugar (not too much), and maybe some citrus juice or something else (mint?) for additional flavor. Combine in a blender, pour into molds and freeze for 3 hours to overnight. In terms of molds, Cuisipro has some of the cutest you've ever seen including these star pop-up molds which don't even require additional wooden popsicle sticks; they come with their own plastic sticks as part of the mold design which you can pop in the dish washer and use again and again.

    I tried these with uncooked macerated berries as well as tried bringing them to a boil with water and sugar first and then blending. The latter process seemed to work particularly well to bring out the flavors in raspberries. You can add yogurt to make a creamier pop (and swirl or stack flavors if you really want to go crazy) or keep it plain and simple. I could lie and tell you that our little guest devoured them but I think he was somewhat disappointed that he was not getting sugary ice cream and instead got disguised fruit. But we adults were very happy!

    Ready for the freezer!

    Note: photos courtesy of the toddler's dad who has a nifty little digital camera!

    Tuesday, July 18, 2006

    Texas caviar


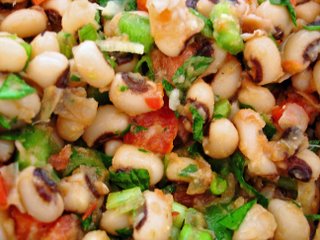
    I happened upon a wonderful recipe for “Texas caviar” in Saveur this month. I had never heard of Texas caviar but a quick google search turned up a million variations on the same theme of spiced, black eyed peas. I’m always game for a good bean/pea salad, especially for one as beautiful as this one looks. What’s more, I’ve been saving dried black eyed peas for Hoppin’ John on New Year’s for some time (without ever executing) so it was about time to make use of them. The original recipe called for a (16 oz) bottle of spicy Italian salad dressing but that seemed a little odd so I tweaked the recipe and we were all happy with the way it turned out.

    16 ounces dried black eyed peas (or two 16 oz cans of canned peas, drained)
    1 red pepper, cored, seeded and diced small
    1 green pepper, cored, seeded and diced small
    1 large tomato cored, seeded and diced
    8 chopped scallions (or to taste) (white and green parts)
    1/3 cup chili sauce (I used Heinz which is mild and slightly sweet)
    1/3 cup vinegar (I used champagne vinegar because that’s what we had but I think white or red wine vinegar would both work well too)
    ¼ cup chopped Cilantro (or Italian parsley if you don’t like cilantro)
    ¼ - 1/3 cup olive oil Salt and pepper

    Cook dried peas (or drain canned peas). Black eyed peas cook fast and will quickly become mushy if you don't keep watch. Combine cooked peas with the rest of the ingredients, season with salt and pepper, and adjust other seasonings to taste. Cover with plastic wrap and refrigerate for 3 hours or overnight to allow beans to marinate and flavors to combine. Serve as a side salad (cold or at room temperature) or as a dip with chips.

    Variations: Add 1 (4 oz) jar chopped pimentos
    Add 1 garlic clove
    Add 2 jalapeno peppers, chopped
    Add a few dashes of Tabasco, to taste
    Breakfast and Brunch

    Dinner mains

    Starters, salads and sides

    Dessert

    Cocktails and other beverages

    Sunday, July 09, 2006

    Essence of summer corn salad


    My mother-in-law visited this week from Texas to help us settle in. I asked her to bring her famous New Orleans spicy shrimp recipe (which she has been making for the past 30 years or so!) so I could add a southern recipe to my repertoire (I will share the recipe soon). We had the wonderful spicy shrimp on Saturday night with “Texas caviar” (to come in a later post). On Sunday, it was back to the barbeque with hot dogs accompanied by fresh corn salad made with local Long Island corn.

    I’ve made this corn salad a gazillion times and love it every time. It is the essence of summer – sweet fresh corn and light flavors -- and is a welcome alternative to corn on the cob. The cider vinegar brings out the sweetness in the corn without overpowering it and the red onion and scallions give it just enough kick. The trick is not to over-cook the corn -- the kernels need only be cooked until they lose their starchiness (but still retain their crunch).

    Fresh corn salad from the Barefoot Contessa (she says it serves 10-12 but 6 will readily devour this!)

    5 tablespoons good-quality olive oil
    8 cups fresh corn kernels (10-12 ears)
    1 teaspoon salt (or more to taste)
    ½ teaspoon freshly ground pepper
    1 cup small diced red onion
    ¼ cup thinly sliced scallion, white and green parts (2 scallions)
    2 tablespoons cider vinegar
    1 cup julienned basil leaves

    Heat a large skillet over medium heat and add 3 tablespoons of olive oil. When oil is hot, add corn, salt, and pepper and cook for 5 minutes (or less) until just cooked and no longer starchy. Remove from heat and stir in red onion, scallion, cider vinegar and remaining 2 tablespoons olive oil. Allow salad to cool; stir in basil before serving. Serve cold or at room temperature.
    Tuesday, July 04, 2006

    Chocolate sour cream cupcakes with buttercream frosting


    I’ve been slow to post this week because we moved. The kitchen (and everywhere else) needs some serious organizing – that will be the major project for the week.

    We rented a house by the beach for the month of July and spent our first weekend out there this weekend. Despite the fact that we had only been in our new apartment for a few days and had lots we wanted to do there, it was wonderful to take a break from boxes. On Sunday we had R’s sister and a friend out for a southern-style shrimp boil (more on this later – I’m still perfecting the recipe). The weather was perfect and we ate outside under the shade of umbrellas. On Monday, my sister and cousin came out and we barbecued and hung out by the pool. I made cupcakes to celebrate the Fourth of July decorating them with red, white and blue sugar stars that I found at NY Cake.

    I pulled the cupcake recipe from Elinor Klivan’s Cupcakes which I’ve found to have very reliable recipes and some good ideas. The chocolate sour cream cupcake is moist and scrumptious and is simple to make. I went with a traditional buttercream frosting to keep things easy as we don’t have a lot of baking supplies or equipment in the summer house.

    Chocolate sour cream cupcake batter

    (Makes enough batter for 18 regular cupcakes, 12 extra-large cupcakes, or 60 mini cupcakes. I could also see using this for a traditional sheet cake)

    3 ounces unsweetened chocolate, chopped
    1 cup unbleached all-purpose flour
    ½ teaspoon baking soda
    ½ teaspoon baking powder
    ¼ teaspoon salt
    ½ cup (1 stick) unsalted butter, at room temperature
    1 ¼ cups sugar
    2 large eggs
    1 teaspoon vanilla extract
    ½ cup sour cream
    ½ cup water

    Put the chocolate in a heatproof bowl or the top of a double boiler and place it over, but not touching, a saucepan of barely simmering water (or the bottom of the double boiler). Stir until the chocolate is melted and smooth. Remove from the water and set aside to cool slightly.

    Sift the flour, baking soda, baking powder, and salt into a medium bowl and set aside.

    In a large bowl, using an electric mixer on medium speed, beat the butter and sugar until smoothly blended and creamy, about 2 minutes. Stop the mixer and scrape the sides of the bowl as needed during mixing. On low speed, mix in the melted chocolate. On medium speed, add the eggs one at a time, mixing until each is blended into the batter. Add the vanilla and beat until the mixture looks creamy and the color has lightened slightly, about 1 minute. Mix in the sour cream until no white streaks remain. On low speed, add half of the flour mixture mixing just to incorporate it. Mix in the water. Mix in the remaining flour mixture until it is incorporated and the batter looks smooth. The batter is ready to bake, or for additions such as nuts, fruit, chocolate chips, or other flavorings.
    Bake cupcakes at 350 for approximately 20 minutes.

    Frosting

    ½ cup (1 stick) unsalted butter, at room temperature
    3 cups powdered sugar
    1 teaspoon vanilla extract
    3 to 4 tablespoons whole milk (I used skim because that’s what we had and that was fine)

    In a large bowl, using an electric mixer on low speed, beat the butter, powdered sugar, and vanilla together with 3 tablespoons milk, then add up to 1 tablespoon more milk if needed to form a creamy, smooth, spreadable frosting. Use a small metal spatula to spread about 2 ½ tablespoons of frosting over the top of each cupcake. Decorate as desired.

    The cupcakes can be covered and stored at room temperature for up to 2 days.

    Optional: The frosting can be flavored with ½ teaspoon almond extract or 1 teaspoon grated lemon or orange zest.

    Tuesday, June 20, 2006

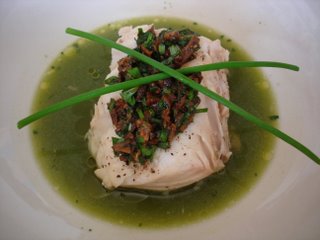
    Halibut (and cockles) in herb broth from Martha Stewart

    This is a really simple but impressive-looking and tasting dish. It calls for cockles too but I skipped them this time. Wild halibut is so delicious right now it can easily stand on its own.

    Serves 4

    1/2 ounce dried porcini mushrooms
    1/4 cup fresh basil leaves, plus 3 tablespoons finely chopped
    1/4 cup coarsely chopped fresh chives, plus 3 tablespoons finely chopped
    1/4 cup fresh tarragon leaves, plus 3 tablespoons finely chopped
    1/4 cup fresh flat-leaf parsley, plus 3 tablespoons finely chopped
    1/3 cup extra virgin olive oil
    Coarse salt
    3 cups fish stock (I bought Kitchen Basics' natural seafood stock (fish fumet) which is carried at Whole Foods and it worked just fine)
    1 pound cockles or clams, scrubbed
    4 Pacific halibut, striped bass, or Pacific cod fillets (about 1 1/2 pounds in total), skinned, bones removed
    Freshly ground pepper

    Cover mushrooms with boiling water. Let stand until softened, about 3 minutes. Drain and finely chopped, set aside.

    Put 1/4 cup of each of the herbs into a food processor; set aside. Stir together remaining 3 tablespoons of each of the herbs, the mushrooms, oil and 1/2 teaspoon salt in a medium bowl; set aside.

    Bring stock to a boil in a medium pot. Reduce heat to medium-low; add cockles. Cover; cook until cockles open, about 2 minutes. Discard any that do not open. Using a slotted spoon, transfer cockles to a bowl, and cover (keep heat on).

    Season both sides of fish with salt and pepper. Add to stock. Cover; cook, carefully turning once, until center is opaque, 2 - 3 minutes per side (may be slightly longer if fillet is very thick). Using a slotted spatula, transfer fish to a plate, and cover.

    Bring stock to a boil. Pour half the stock into food processor with herbs; puree (be careful with hot liquid). Add to remaining stock; pour through a fine sieve into a medium bowl, pressing on herbs; discard herbs (I just pour the food processed mixture back into the original pot with the remaining stock through a sieve - saves a bowl to wash). Divide fish and cockles among bowls. Ladle broth into bowls; top fish with reserved herb mixture.

    Friday, June 16, 2006

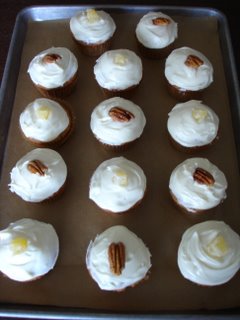
    Hummingbird cupcakes from Martha Stewart


    Hummingbird cake is always a non-chocolate favorite. There are many recipes out there that are largely similar except in butter and oil content. Some leave out the coconut. I opted for Martha's because I generally find her recipes to work well. She called for dried pineapple "flowers" as a garnish but they were too fussy for me (although beautiful). Truth be told, I tried to make them and failed - they never dried out enough. See Martha Stewart for details. I experimented with a couple of other garnishes instead -- store-bought dried pineapple and pecans to suggest the ingredients in the batter and sweet peas and nasturtiums I found in the farmer's market to remind of hummingbirds (plus, don't they look sweet?).

    For the cupcakes (makes 24 cupcakes)

    3 cups all-purpose flour, plus more for pan
    1 teaspoon baking soda
    1 teaspoon ground cinnamon
    1/2 teaspoon salt
    1 cup (2 sticks) unsalted butter, melted and cooled
    2 teaspoons pure vanilla extract
    2 cups sugar
    3 large eggs
    2 cups mashed ripe banana (about 3 large)
    One 8-ounce can crushed pineapple, drained
    1 cup chopped walnuts or pecans
    1 cup unsweetened desiccated coconut

    Preheat oven to 350°, with rack in center. Line cupcake pan with paper liners; set aside. In a medium bowl, whisk together flour, baking soda, cinnamon, and salt; set aside.

    In the bowl of an electric mixer fitted with the paddle attachment, beat butter, vanilla, and sugar until combined, about 2 minutes. Add eggs one at a time, incorporating each before adding the next. Beat at medium speed until mixture is pale yellow and fluffy, about 3 minutes.

    In a medium bowl, stir together banana, pineapple, walnuts, and coconut. Add to egg mixture, mixing until combined. Stir in flour mixture.

    Divide batter evenly among liners, filling about 2/3 full. Bake, rotating pans halfway through, until golden brown and a cake tester inserted in the center comes out clean, 25 to 28 minutes.

    Transfer to a wire rack to cool completely. Once cupcakes have cooled, use a small offset spatula to frost tops of each cupcake. Decorate with dried pineapple flowers, if desired. Serve at room temperature.

    For the frosting (Makes 3 cups)

    8 ounces cream cheese, room temperature
    1 teaspoon pure vanilla extract
    1/2 cup (1 stick) unsalted butter, cut into pieces, room temperature
    1 pound confectioners' sugar, sifted

    In the bowl of an electric mixer fitted with the paddle attachment, beat cream cheese and vanilla until light and creamy, about 2 minutes. With mixer on medium speed, gradually add butter, beating until incorporated.

    Reduce mixer speed to low. Gradually add sugar, beating until incorporated. Use immediately, or cover and refrigerate up to 3 days. Bring to room temperature before using.

    Note: Adapted from Martha Stewart Living, June 2003

    Spicy low-fat chicken patty


    I make this when I'm feeling like being really virtuous. It's very healthy and full of flavor. It requires a lot of ingredients but most are pantry items. I have no idea where this recipe came from any more.

    Spicy low-fat chicken patty

    1 1/4 lbs boneless, skinless chicken breast, trimmed of fat and finely chopped by hand
    1/2 bunch scallions, finely chopped
    1/2 cup finely chopped fresh cilantro leaves (or Italian parsley if you don't like cilantro)
    1 1/2 tablespoons finely chopped, peeled, fresh ginger
    2 garlic cloves, finely chopped
    1 teaspoon grainy mustard
    1/2 to 1 teaspoon Vietnamese chili paste
    3 large eggs whites or 2 large eggs
    1 1/4 cups quick-cooking oats coarsely ground in a blender or food processor
    1 tsp kosher salt
    1/2 tsp black pepper
    Juice of 1 lemon or lime

    Preheat oven to 350 degrees. Place all ingredients except lemon juice in a medium size mixing bowl and mix well. Shape into six patties.

    Place a large ovenproof nonstick skillet over medium heat and when it is hot, add the patties. Cook until deeply browned, about 4 minutes on each side.

    Transfer skillet to the oven and bake for 8 minutes, or until the patties are thoroughly cooked.

    Drizzle with the lemon juice and serve immediately.

    Zucchini soup recipe from Alison

    This is an old recipe from a friend (I don't remember where she got it anymore) which makes a healthy, flavorful soup that's good hot or cold (I usually serve it cold). I usually add ~4x the amount of curry powder to pump up the flavor -- season as you like.

    1 tbsp olive oil
    2 lbs zucchini, sliced
    3/4 cup yellow onion, finally chopped
    1/2 tsp curry powder (or to your taste)
    2 1/2 cups chicken stock
    Salt & pepper to taste
    Sour cream for garnish

    Slice (1/4 inch thick) zucchini and saute in a large, deep pan in hot oil for 2 minutes. Add onion, cover, cook 5 minutes. Add curry, cook 1 minute. Add chicken stock, boil, and cook for 30 minutes after full boil. Puree in blender or food processor being careful not to burn yourself. Garnish and serve.