I have tagged several classic French recipes in my Bouchon cookbook that I want to try. One of them is Beef Bourguignon, which looks so complicated and time-consuming that I've delayed tackling it for the past six months. Now that it’s August, I have an excuse to prolong the delay since it’s not exactly hearty stew weather. Another of the recipes is for a classic French quiche. Well quiche isn’t too hard, right?
That's what I thought as I pulled ingredients together for quiche. I started making it in the early afternoon thinking that, served with a
great green salad, it would make the perfect light summer dinner. I did not bother to read the entire recipe carefully before I started. I mean, it’s quiche -- how hard can it be? Wrong! This was the most time-consuming and scientifically precise recipe for quiche that I have ever seen. The process involved many steps of forming, blind-baking and cooling the shell, cooking, rendering and whipping the various fillings, and slow-cooking the quiche to create a creamy texture.
There are apparently a few keys to making the perfect, creamy quiche:
1) Using a 9-inch wide by 2-inch high ring mold and parchment paper vs. a classic pan to cook the quiche so that the bottom crust remains crusty and not soggy;
2) Whipping the custard mixture so that it’s frothy both to create a light texture and help suspend the fillings within the quiche;
3) Making sure the custard and all of the ingredients go into the oven warm so that the custard starts cooking as soon as it’s in the oven; and
4) Cooking it in an oven heated to no higher and no lower than 325 degrees so that the quiche is hot enough to prevent the custard from saturating the crust and making it soggy, and cool enough so that it cooks slowly, producing a creamy texture
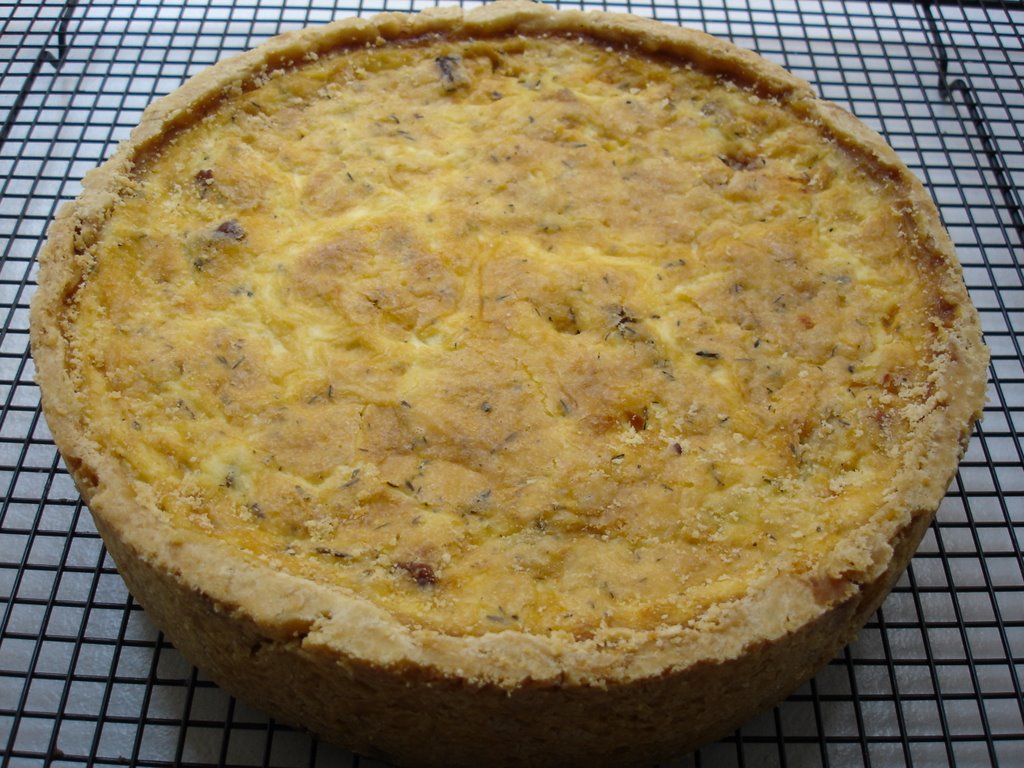
Phew! Suffice it to say, dinner ended up being 24 hours later due to all of the steps involved, but boy was it worth it! The result was a true French quiche with a creamy texture and full flavor. I made Quiche Lorraine which was sumptuous given the slab bacon, comté cheese and “onion confit” (onions cooked for several hours with butter and a bouquet garni of thyme, parsley, bay leaves and black peppercorns). I’ll post the recipe for a basic quiche since it’s considerably shorter. If you’d like the specifics for the Quiche Lorraine, feel free to post a comment and I’ll pass on the (substantial) information.
For the dough:
Use the basic chilled pâte brisée recipe from the
rustic fig tart post (doubled in quantity).
For the shell:
Roll the dough into a circle 14 inches in diameter and 3/16 inch thick. Re-chill the dough if it has become soft after rolling out.
Lightly brush the inside of a 9-inch wide by 2-inch high ring mold with canola oil and place it onto a parchment-lined baking sheet.
Carefully lift the dough into the ring (you can fold the dough over twice and then unfold it on top of the ring or use a rolling pin to roll-up, lift and then unroll onto the ring), center it on the ring and then lower the dough into the ring, pressing it gently against the sides and into the bottom corners of the ring. Trim any dough that extends more than an inch over the sides of the mold and reserve the scraps. Fold the excess dough over against the outside of the ring (to prevent it from shrinking down the sides as it bakes – the excess dough will be removed after the quiche is baked). Carefully check for any cracks or holes in the dough, and patch with the reserved dough as necessary. Place in the refrigerator or freezer for at least 20 minutes to resolidify the butter. Reserve the remaining dough scraps.
Put a rack set in the middle of the oven and preheat the oven to 375.
Line the quiche shell with a 16-inch round of parchment. Fill the shell with pie weights or dried beans, gently guiding the weights into the corners of the shell and filling the shell completely.
Bake the shell for 35 to 45 minutes or until the edges of the dough are lightly browned but the bottom is still light in color.
Carefully remove the parchment and weights. Check the dough for any new cracks for holes and patch with the thin pieces of reserved dough if necessary. Return the shell to the oven for another 15 to 20 minutes, or until the bottom is a rich golden brown. Remove from the oven and allow the shell to cool completely on the baking sheet. Once again, check the dough for any cracks or holes or and patch if necessary before filling the quiche batter. Turn the oven down to 325 degrees.
For the batter:
2 cups milk
2 cups heavy cream
6 large eggs
1 tablespoon kosher salt
¼ teaspoons freshly ground white pepper
6 gratings fresh nutmeg
Combine the milk and cream in a large saucepan and heat over medium heat until scalded (meaning a skin begins to form on the surface). Remove from the heat and let cool for 15 minutes before continuing.
Put 3 eggs, half the milk and cream mixture, 1 ½ teaspoons salt, 1/8 teaspoon white pepper, and 3 gratings of nutmeg in a blender and blend on low speed for a few seconds to combine the ingredients. Increase the speed to high and blend for 30 seconds to a minute, or until the batter is light and foamy. This is the first layer of the quiche: once you have assembled it, add the remaining ingredients to the blender and repeat the process to complete the quiche.
There may be a little excess batter depending on how much air is incorporated into the batter as it is blended. The quiche may sink slightly as it bakes. So check it after about 20 minutes and if there is room, add a bit more of the batter to the top.
Bake at 325 for approximately 1 ½ to 1 ¾ hours, or until the top of the quiche is browned and the custard is set when the pan is jiggled. The custard should jiggle uniformly throughout vs. jiggle more quickly in the center. Be aware that the quiche will continue to cook once out of the oven, and do not overcook.
The quiche needs to be thoroughly chilled before it’s cut, so make your quiche at least a day and up to three days before serving it. Trim any excess crust that extends above the custard using a serrated knife. Cut individual slices using a serrated knife for the side crust and a slicing knife through the custard and bottom crust and reheat in a 375 degree oven (for 15 minutes or until hot throughout) on a parchment-lined baking sheet before serving.


 I saw an interview with Thomas Keller in which he said that he believes most of the people who buy his cookbooks do so more for the desire to feel like they have experienced one of his restaurants in some way than because they actually intend to use the recipes. I am sure that’s true because as much as I love to cook and am often up for a “project” – the recipes in the The French Laundry Cookbook in particular are a little too intimidating. I do love gazing longingly at the beautiful photographs, however, and as I was doing so recently, I discovered that there are quite a few quick recipes for garnishes, powders and chips that, although really just a footnote to the main recipes, are nevertheless interesting and quite doable.
 Garlic chips (adapted from the The French Laundry Cookbook)