Showing posts with label side dish. Show all posts

Wednesday, October 17, 2007

Beans (or jewels?)


I didn't grow up eating a lot of beans. I think my mom thought they were too time-consuming to cook (and so did I having experienced the nightmare of stale Goya beans languishing on the shelf at the local grocery store - slow to cook and mushy in texture once cooked). I've discovered the pleasures of great beans as an adult. I like them best by themselves - as a side dish or as a main dish with rice, simply prepared so you can really taste them.

I was introduced to a terrific little company, Rancho Gordo, from California that concentrates on heirloom beans. They have a constantly evolving menu of dried beans that are as much a delight to the eyes as to the palette. They all look like jewels to me and I find myself selecting them more on the basis of appearance than on the description of their taste (since they're all yummy anyway). The flavor and texture of these beans is unlike any you will find sitting around (endlessly) on the shelf of a conventional supermarket. I ordered a batch last year that I gave out as holiday goodies and recently ordered another batch just for us since the recent change in weather is starting to make it feel like bean-eating season.

Rancho Gordo is slightly off-beat and irreverent. They publish a blog that has recipe suggestions and more commentary on the beans they collect and develop. The descriptions on their site are irresistible. One particularly beautiful black bean is described as: "an oddly beautiful bean that looks as if someone went at it with an airbrush. When cooked, it's a firm, whole brown bean with a slight fudge texture and piney flavor. It's very rich, so prepare simply."

The cooking instructions that arrive with the beans are spot on (see mom, not so hard!).

********************************************************************************
Rancho Gordo method:
Check beans for small debris and rinse in cool, fresh water. Cover beans with two inches of water and soak for 4-6 hours.

In a large pot sauté finely chopped onion; celery, carrot and garlic (or any combination you prefer) in olive oil until soft. Add beans and water- and make sure beans ore covered by at least one inch of water. Bring to a hard boil for five minutes and then reduce to a gentle simmer. Once soft, add salt. Beans can take from one to three hours to cook. Slow and low is best!

More about beans:
Do not add acids (tomatoes, vinegar) or sugars until the beans ore just tender, as they can toughen the beans. You can replace some of the cooking water with beer or stock. Bay leaves are nice, as well as ham bones or smoked turkey legs. But in general, fresh, heirloom beans need little help.

If you need to add more water as the beans are cooking, only add warm water from a kettle. Cold water can harden the beans, and hot tap water is not good for you or your taste buds.

Some people believe that changing the soaking water will help alleviate the "gas" problem for which beans are famous. Some people believe you throw out some vitamins and goodness when you do this. Epazote, a culinary herb, is said to help. This makes more gastronomic sense than throwing out the soaking water. Research reaches no definitive conclusions. From my experience, the best way to help with the gas is to eat more beans.

********************************************************************************

My husband, who is a bean fanatic, got very excited when he saw our box arrive in the mail. We're having them for dinner as an accompaniment to fish tomorrow.

P.S. The vegetable in the photo on the left is kohlrabi and has absolutely nothing to do with this post other than the fact that I saw some at the market and thought it would make a nice color-based diptych with my beans. I have absolutely no idea what to do with Kohlrabi - any ideas, please send them my way!

Sunday, October 29, 2006

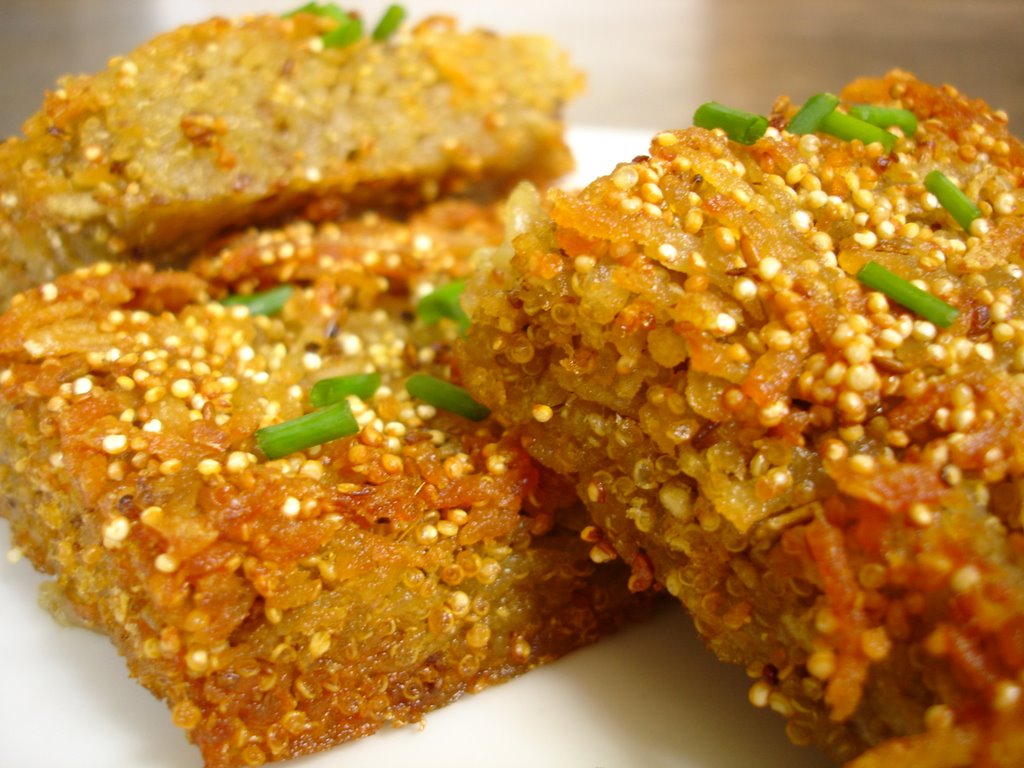
Potato, quinoa, and cumin hash browns


I decided to check out the new Chow foodie site. It was recently bought by CNET it is chock full of great content: I wish I created it myself! It has some terrific recipes in addition to cookbook and product reviews and instructional videos / content. My eye fell on a recipe for potato, quinoa and cumin hash browns which looked interesting and unusual. I happened to catch it just before a planned brunch for this weekend -- what a great time to try it out! I did everything up until the frying the day before and then just took the potatoes out of the refrigerator and cut and fried them morning of. This made what is a somewhat lengthy process (due to the 3 hours required to chill the potatoes before frying) more manageable. The hash browns turned out scrumptious and the toasted cumin added just the right twist to the old classic. I found the fact that they pre-baked and chilled the potatoes interesting – I assume that was to get them to hold a nice, compact, square shape, which they did.

Total Time: 1 hr 20 mins, plus chilling time (~3 hours additional)
Active Time: 50 mins
Makes: 12 hash browns

1 cup quinoa
3 tablespoons cumin, toasted
4 teaspoons kosher salt
2 1/2 pounds peeled Idaho potatoes
1 bunch chives, chopped

Heat oven to 400°F. Using a spice grinder or a mortar and pestle, coarsely grind together the quinoa, cumin, and salt; set aside.

Using a food processor with the grating attachment, grate the potatoes. Remove the grated potatoes from the processor and place them in a mixing bowl. (Alternatively, you can use a box grater.)

Let the grated potatoes rest for 5 minutes. Squeeze the liquid from the potatoes, one handful at a time, and place them in a separate, clean mixing bowl.

Add the ground quinoa, cumin, and salt mixture to the squeezed potatoes, and mix with your hands until well incorporated. Oil a 9-by-13-inch baking dish with olive oil and place a piece of parchment paper on the bottom, cut to fit exactly.

Pour the potato mixture into the oiled pan and pack it down (make sure to keep it a consistent thickness). Brush the top of the mixture with some more olive oil, and cover with another piece of parchment paper placed directly on the potatoes.

Place in the preheated oven and bake for 25 minutes. Remove from the oven and allow to cool to room temperature. Place in the refrigerator to cool completely, about 3 hours.

After 3 hours, remove from the refrigerator and slide a thin, sharp knife around the perimeter of the potatoes to loosen them from the pan. Flip the potatoes onto a cutting board. Trim off any crisp edges and cut into 12 equal pieces.

Fill a frying pan with 1/2 inch of a neutral oil (such as vegetable, canola, or peanut) and heat over medium heat. When the oil is hot (about 350°F), fry the hash browns until crisp and golden brown, about 3 to 5 minutes per side. Drain the finished hash browns on paper towels, season with salt, garnish with chopped chives, and serve.

Sunday, July 09, 2006

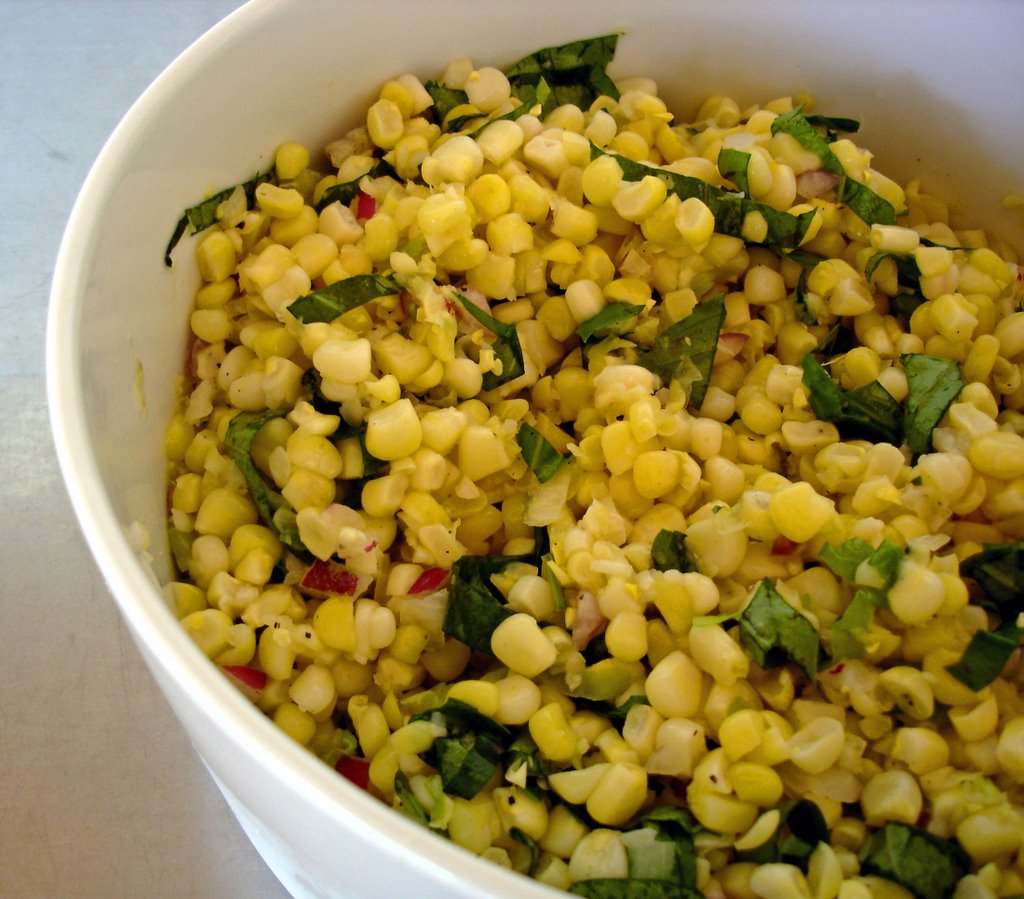
Essence of summer corn salad


My mother-in-law visited this week from Texas to help us settle in. I asked her to bring her famous New Orleans spicy shrimp recipe (which she has been making for the past 30 years or so!) so I could add a southern recipe to my repertoire (I will share the recipe soon). We had the wonderful spicy shrimp on Saturday night with “Texas caviar” (to come in a later post). On Sunday, it was back to the barbeque with hot dogs accompanied by fresh corn salad made with local Long Island corn.

I’ve made this corn salad a gazillion times and love it every time. It is the essence of summer – sweet fresh corn and light flavors -- and is a welcome alternative to corn on the cob. The cider vinegar brings out the sweetness in the corn without overpowering it and the red onion and scallions give it just enough kick. The trick is not to over-cook the corn -- the kernels need only be cooked until they lose their starchiness (but still retain their crunch).

Fresh corn salad from the Barefoot Contessa (she says it serves 10-12 but 6 will readily devour this!)

5 tablespoons good-quality olive oil
8 cups fresh corn kernels (10-12 ears)
1 teaspoon salt (or more to taste)
½ teaspoon freshly ground pepper
1 cup small diced red onion
¼ cup thinly sliced scallion, white and green parts (2 scallions)
2 tablespoons cider vinegar
1 cup julienned basil leaves

Heat a large skillet over medium heat and add 3 tablespoons of olive oil. When oil is hot, add corn, salt, and pepper and cook for 5 minutes (or less) until just cooked and no longer starchy. Remove from heat and stir in red onion, scallion, cider vinegar and remaining 2 tablespoons olive oil. Allow salad to cool; stir in basil before serving. Serve cold or at room temperature.