Showing posts with label Barefoot Contessa. Show all posts

Saturday, February 07, 2009

Sweetie sweets take 2: fleur de sel caramels

It’s that time again – Valentine’s Day. It’s either a holiday that you love or hate. I’m in the love camp. It’s such a great excuse to be a little silly and of course, to cook some sweets! Last year I made truffles in the spirit of the holiday. This year I was taken with a recipe for fleur de sel caramels that I saw in House Beautiful. It’s an Ina Garten recipe. This is just a perfect occasion to employ one of Ina’s buttery, creamy, sugary fattening best! The fleur de sel is the perfect complement to the sweet caramel and pretty to look at as well. Homemade caramels are completely different from the dry, overly tacky caramels that we think of from

I was a bit wary as I’d never made caramels before but they were quite simple and quick. I followed Ina’s recipe to a “t” until I got to the very last step: forming the individual caramels. I’ve adjusted the recipe below to reflect my changes.

p.s. A couple of photography notes: my photo of homemade cinnamon buns won the "aesthetics" award in last month's DMBLGIT - thanks so much Zorra and judges!
Lou Manna is having a photo contest to help find inspiration for the cover of his next book. Read more about it here.


Fleur de sel caramels (by the Barefoot Contessa, adapted from recipe printed in HouseBeautiful)
(Makes 30 caramels)

Vegetable oil
1 1/2 cups granulated sugar
1/4 cup light corn syrup
1 cup heavy cream
5 tablespoons unsalted butter
1 teaspoon fleur de sel, plus extra for sprinkling
1/2 teaspoon pure vanilla extract

1. Line the bottom of an 8-inch-square baking pan with parchment paper, then brush the paper lightly with oil, allowing the paper to drape over two sides.

2. In a deep saucepan (89 diameter by 4 1/2" deep), stir together 1/4 cup water with the sugar and corn syrup and bring them to a boil over medium-high heat. Continue to boil until the mixture is a warm golden brown color. Don't stir — just swirl the pan to mix. Watch carefully, as it will burn quickly at the end!

3. In the meantime, in a small pan, bring the cream, butter, and 1 teaspoon of fleur de sel to a simmer over medium heat. Turn off the heat and set aside.

4. When the sugar mixture is a warm golden color, turn off the heat and slowly add the cream mixture to the sugar mixture. Be careful! It will bubble up violently. Stir in the vanilla with a wooden spoon and cook over medium-low heat for about 10 minutes, until the mixture reaches 248°F (firm ball) on a candy thermometer. Very carefully (because it's hot!) pour the caramel into the prepared pan and refrigerate until firm.

5. When the caramels are cold, use the parchment paper to pry the sheet from the pan onto a cutting board (note: the caramels will still be supple and easy to handle – if too stiff, allow to sit at room temperature for 10 minutes). Using the parchment and starting from the long side, tightly roll the caramel up until you have rolled 1/3 of it. Cut along the edge and repeat two more times. Use the parchment to gently roll each log to even out the thickness and smooth out the seam from the cut side. Cut each roll into 8-10 pieces, taking care not to touch the caramel with your finger. Sprinkle each piece with fleur de sel and wrap individually in glassine or parchment paper. Store in the refrigerator and serve the caramels chilled.

Tuesday, January 15, 2008

Spicing it up: classic Bloody Mary

There are a couple of drink challenges going on this month: one for “Click,” and the other for my "Still Life With" food photography group on flickr. I’ve been thinking about drinks that would both provide a photography challenge and be fun to drink and have come up with two ideas. The first, posted here, is the classic Bloody Mary. Fellow blogger Lynne from Café Lynnylu beat me to the punch with a beautiful creole Bloody Mary. You can see hers here.

I love nothing more than a two-fisted Sunday brunch experience: a Bloody Mary in one hand and a cappuccino in the other. If I don’t wake up after that, there’s absolutely no hope. I love the bite of a good Bloody Mary and love the way it cuts through eggs or whatever other less than healthy feast you may be having on a lazy Sunday. There are countless ways to concoct a Bloody Mary according to your taste - be it smooth, thick, mild or spicy.

I did a search for Bloody Mary recipes and seemingly every chef and bar tender has a version. Most are variations on the classic ingredients: vodka, tomato juice, lemon or lime juice, Tabasco, horseradish, celery salt, and Worcestershire sauce. Others have put their own spin on it adding wasabi, basalmic vinegar, sherry, red wine, or beef bouillon (otherwise known as a “bloody bull” (as my cousin would have it)).

Garnish options abound. Celery and olives are classic. Other common garnishes include pickled beans or okra, radishes, cherry tomatoes or jalapeño peppers.

I, myself, like a virgin Bloody Mary (i.e. without alcohol: I have a hard enough time dealing with vodka after sundown), and I like it to be spicy and meaty, with tons of flecks of “stuff” floating around in it. Everyone has a different tolerance for heat. The best bet for preparing a pitcher for guests is to leave out the vodka and go light on the Tabasco, providing vodka, extra Tabasco, seasonings and toppings on the side so everyone can prepare and spice up her own.

If you want to veer off the classic track a little, there are my cousins to the Bloody Mary that result from replacing vodka with other alcohols or changing the mixer. For example, there’s a Bloody Maria that uses Tequila and a Ruddy Mary that uses gin in place of vodka. In terms of mixer changes, there’s a Bull Shot that replaces tomato juice entirely with beef bouillon or beef consommé, and a Bloody Caesar that replaces tomato juice with Clamato (a clam juice / tomato juice combination) that is apparently more popular in Canada than the traditional version.

All of this, of course, begs the question of why a Bloody Mary is so named. You can read up on this in detail (plus find a reference to an interesting-sounding book solely on the Bloody Mary if you are so inclined to dig further) in a Bon Appétit article Café Lynnylu found. The part of the story I take particular interest in, of course, is the part that ascribes the rise of the drink to old New York: the drink apparently first appeared at Harry's New York Bar in Paris and where it was invented by bartender Petiot. John Jacob Astor allegedly discovered the drink at Harry's and brought both the bartender and his drink to the Astor’s hotel, The St. Regis. The rest, as they say, is history. Why the name? Some ascribe it to the slaughter of protestants by of Queen Mary Tudor, “Bloody Mary,” the Catholic daughter of Henry VIII. Others say it comes from a British man who incessantly complained about his wife while sipping the tomato-juice based drink at Harry’s bar. There are countless other theories.

If you want to read more, Wikipedia has a nice summary of the history and varieties of Bloody Mary, and an entire website devoted solely to recipes. For more on the history and lore surrounding the Bloody Mary, see Bon Appétit here.

Bloody Mary (adapted from the Barefoot Contessa)

I like starting with the Barefoot Contessa’s tame version and spicing it up to my taste. Her version calls for minced celery stalks which adds a nice, thick texture to the mix. I then double most of the seasonings and add the juice of one lime, a teaspoon of freshly ground black pepper (not too course as that can be unpleasant) and my own secret juju: ¼ cup olive juice (yum!). I’m providing my own version below, but the original can be found here.

3 large stalks celery from the heart, including leaves, plus extra for serving
1 46 ounce can tomato juice (recommended: Sacramento)
5 teaspoons prepared horseradish
3 teaspoon grated yellow onion
1/4 cup olive juice
1 lemon, juiced
1 lime, juiced
1 teaspoon Worcestershire sauce
1 1/2 teaspoon celery salt
1 teaspoon freshly ground pepper
1/2 teaspoon kosher salt
16 dashes hot sauce (recommended: Tabasco), or to taste
1 3/4 cups vodka
(optional)

Cut the celery in large dice, including the leaves, and puree in the bowl of a food processor fitted with the steel blade. Process until finely minced. In a large pitcher, combine the rest of the ingredients except the vodka. With the food processor running, pour 1/4 of the tomato juice mixture into the food processor through the feed tube. Then pour the contents of the food processor into the pitcher with the remaining tomato juice mixture. Adjust seasonings to taste. Add the vodka and chill. Serve in tall glasses over ice with a stick of celery, olives or other garnish of your choice.

Friday, January 04, 2008

A bit of sunshine in the winter: lemon cake

I’ve been looking back through the archives at posts from the very beginning of the blog. They are somewhat dreadful. Some don’t have photographs and others have photographs that are sorely lacking. I didn’t really write much about the dish or the context, mostly just posted the recipe.

When I first started blogging, I did it more to record and organize my recipes and learn about blogging than to really explore and share my culinary experiences. As time went on, I started to really enjoy writing about food and exchanging thoughts and reactions with other bloggers and blog readers. I then really stepped back to think about what it is that I love about food and cooking and realized it’s both the chemistry and art of combining ingredients and creating a dish, and the aesthetics of food that I love: the colors, textures and scale of the dish and the way it is presented at the table. I enjoy art and design as much as I enjoy food, and for me, both are critical to creating something that’s appetizing and memorable. This naturally gave rise to an intense interest in photography, and capturing the beauty in a dish, a table setting, and a scene.

Now that I am approaching blogging with a different angle, I’m going to periodically revisit some of my earlier posts and fill in some of the gaps. The first is one of my favorite go-to cakes, The Barfoot Contessa’s lemon cake. It seems appropriate to revisit this sunny little cake in the midst of winter! This cake is characteristically over-the-top: it’s soaked in a lemon syrup and has a sweet lemon icing on the top. What’s great about it is that given all of the moisture in the cake, it keeps very nicely and is also works pre-sliced and wrapped if you need something that fits that bill. I saw this prepared on one of The Barefoot Contessa’s shows about picnic food, and she prepared and served individually-sized portions of all of her picnic dishes (including the cake) in Chinese takeout cartons – it was a very cute and practical idea.

Lemon cake (From Barefoot Contessa Parties, courtesy of the Food Network)
Yield: 2 (8-inch) loaves

For the cake and lemon syrup
1/2 pound (2 sticks) unsalted butter, at room temperature
2 1/2 cups granulated sugar, divided
4 extra-large eggs, at room temperature
1/3 cup grated lemon zest (6 to 8 large lemons)
3 cups flour
1/2 teaspoon baking powder
1/2 teaspoon baking soda
1 teaspoon kosher salt
3/4 cup freshly squeezed lemon juice, divided
3/4 cup buttermilk, at room temperature
1 teaspoon pure vanilla extract

For the glaze:
2 cups confectioners' sugar, sifted
3 1/2 tablespoons freshly squeezed lemon juice
Preheat the oven to 350 degrees F. Grease and flour 2 (8 1/2 by 4 1/4 by 2 1/2-inch) loaf pans. You may also line the bottom with parchment paper, if desired.
Cream the butter and 2 cups granulated sugar in the bowl of an electric mixer fitted with the paddle attachment, until light and fluffy, about 5 minutes. With the mixer on medium speed, add the eggs, 1 at a time, and the lemon zest.

Sift together the flour, baking powder, baking soda, and salt in a bowl. In another bowl, combine 1/4 cup lemon juice, the buttermilk, and vanilla. Add the flour and buttermilk mixtures alternately to the batter, beginning and ending with the flour. Divide the batter evenly between the pans, smooth the tops, and bake for 45 minutes to 1 hour, until a cake tester comes out clean.

Combine 1/2 cup granulated sugar with 1/2 cup lemon juice in a small saucepan and cook over low heat until the sugar dissolves. When the cakes are done, allow to cool for 10 minutes. Remove the cakes from the pans and set them on a rack set over a tray or sheet pan; spoon the lemon syrup over them. Allow the cakes to cool completely.

For the glaze, combine the confectioners' sugar and the lemon juice in a bowl, mixing with a wire whisk until smooth. Pour over the tops of the cakes and allow the glaze to drizzle down the sides.

Sunday, July 09, 2006

Essence of summer corn salad


My mother-in-law visited this week from Texas to help us settle in. I asked her to bring her famous New Orleans spicy shrimp recipe (which she has been making for the past 30 years or so!) so I could add a southern recipe to my repertoire (I will share the recipe soon). We had the wonderful spicy shrimp on Saturday night with “Texas caviar” (to come in a later post). On Sunday, it was back to the barbeque with hot dogs accompanied by fresh corn salad made with local Long Island corn.

I’ve made this corn salad a gazillion times and love it every time. It is the essence of summer – sweet fresh corn and light flavors -- and is a welcome alternative to corn on the cob. The cider vinegar brings out the sweetness in the corn without overpowering it and the red onion and scallions give it just enough kick. The trick is not to over-cook the corn -- the kernels need only be cooked until they lose their starchiness (but still retain their crunch).

Fresh corn salad from the Barefoot Contessa (she says it serves 10-12 but 6 will readily devour this!)

5 tablespoons good-quality olive oil
8 cups fresh corn kernels (10-12 ears)
1 teaspoon salt (or more to taste)
½ teaspoon freshly ground pepper
1 cup small diced red onion
¼ cup thinly sliced scallion, white and green parts (2 scallions)
2 tablespoons cider vinegar
1 cup julienned basil leaves

Heat a large skillet over medium heat and add 3 tablespoons of olive oil. When oil is hot, add corn, salt, and pepper and cook for 5 minutes (or less) until just cooked and no longer starchy. Remove from heat and stir in red onion, scallion, cider vinegar and remaining 2 tablespoons olive oil. Allow salad to cool; stir in basil before serving. Serve cold or at room temperature.

Wednesday, June 14, 2006

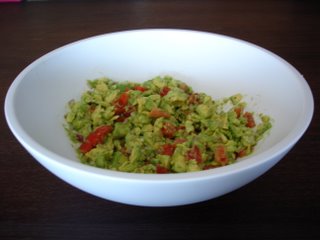
Guacamole from Barefoot Contessa courtesy of the Food Network


This makes wonderfully flavorful guacamole. You will not be able to resist eating the whole thing in one sitting. The lemon juice really keeps the avocados green and beautiful. Pump up the hot pepper sauce if you like it spicy.

Recipe Summary
Difficulty: Easy
Prep Time: 15 minutes
Yield: 3 cups
User Rating:

4 ripe Haas avocados
3 tablespoons freshly squeezed lemon juice (1 lemon)
8 dashes hot pepper sauce
1/2 cup small-diced red onion (1 small onion)
1 large garlic clove, minced
1 teaspoon kosher salt
1 teaspoon freshly ground black pepper
1 medium tomato, seeded, and small-diced

Cut the avocados in 1/2, remove the pits, and scoop the flesh out of their shells into a large bowl. (I use my hands.) Immediately add the lemon juice, hot pepper sauce, onion, garlic, salt, and pepper and toss well. Using a sharp knife, slice through the avocados in the bowl until they are finely diced. Add the tomatoes. Mix well and taste for salt and pepper.