Tuesday, August 15, 2006

Indian food dinner (part 1 of 2)


We had a HUGE treat last week. Friends of ours called to ask if we wanted to cook an impromptu meal together on Saturday night. I suggested we cook Indian food as they are experts on the subject and I appreciate Indian food but know nothing about cooking it. In no time at all my friend D, an enthusiastic cook, came up with a multi-course menu and we divided up a shopping list. We then met back at home where his wife and I dutifully followed all cutting, chopping and blending orders while he whipped around the kitchen turning our choppings into sumptuous fare. It was such a luxury to be treated to a home cooked meal (in our own home!) and to have no more responsibility than to mindlessly chop away while someone else worried about assembling the dishes. We had a wonderful meal of cold cucumber soup, beef curry, mustard shrimp and chickpeas served with Basmati rice infused with cilantro, and of all things, beer. The leftovers were even more magnificent the next day. I'm breaking this post into two to keep you in suspense -- check back next week for the chickpeas and rice.

(Recipes courtesy of D & T)

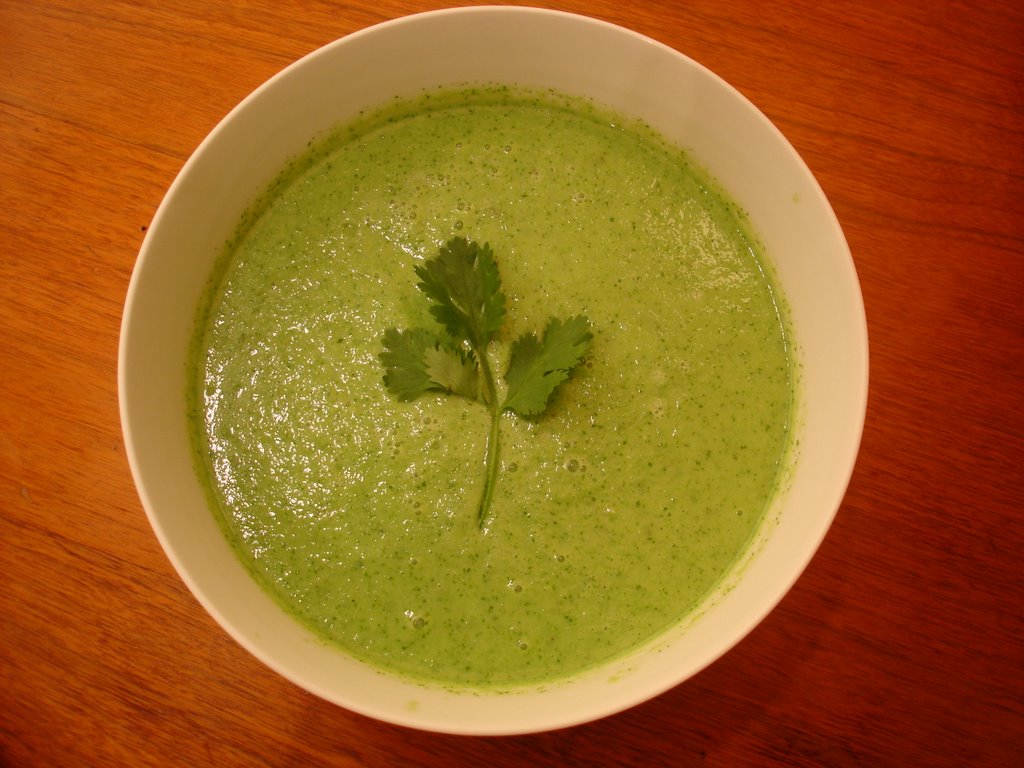
Chilled cucumber soup

2 English cucumbers, peeled
3 cloves of garlic (note: 3 cloves will make a fairly garlicy soup (which we like). You might want to start with 1 clove and add more to suit your own taste)
1 green chili
2-3 tablespoons of extra virgin olive oil
1 quart buttermilk (or plain yogurt)
1/2 bunch coriander (cilantro) leaves
Salt to taste
Optional: ground roasted cumin

Blend all ingredients together. Adjust the consistency of the soup by adding water as desired. Add olive oil. Chill in refrigerator and before serving garnish with roasted cumin and a sprig of coriander leaves (optional).
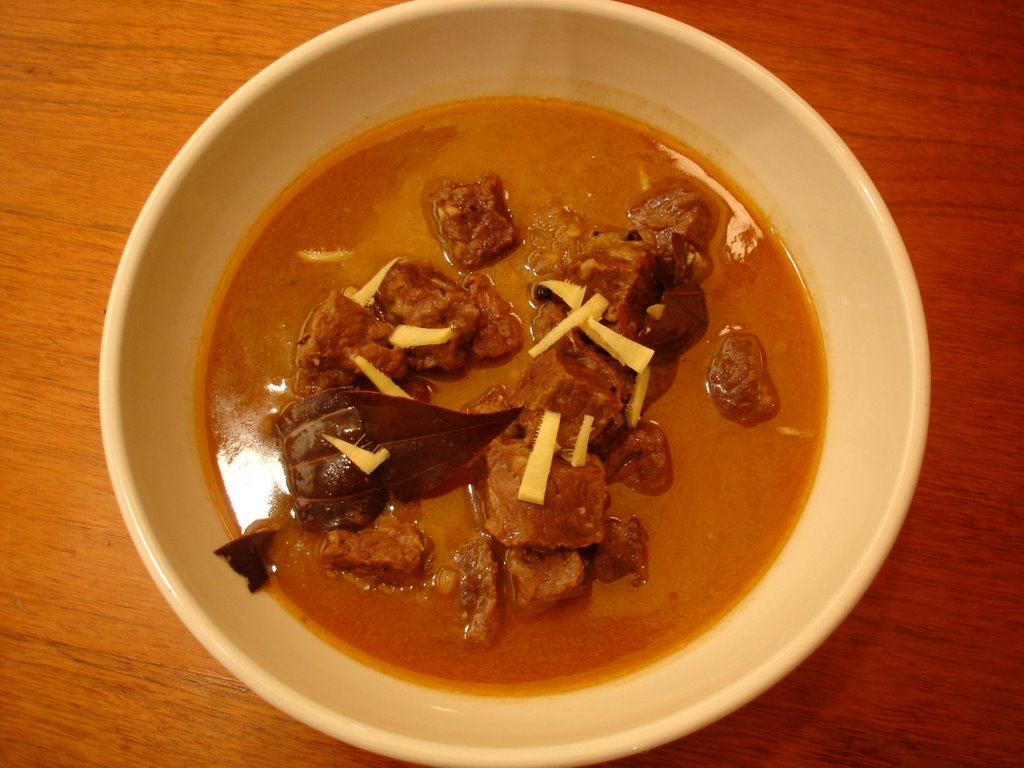

Beef curry

1 medium onion, chopped
3 cloves garlic, crushed/chopped fine
1 tablespoon ginger, chopped fine
1.5 lb stew beef, cubed (or lamb or veal)
1 can coconut milk
4-5 whole cloves
1-2 sticks of cinnamon (try to get Indian cinnamon if possible - less sweet than American)
2-3 bay leaves
ground cumin
ground coriander
pinch of red chili powder or more to taste
dry mango powder ("amchur") or lemon juice to taste
salt to taste

Sauté the onion, garlic, ginger until golden brown and the oil separates. Add the beef cubes and brown. Add the spices and 1/2 the coconut milk and enough water or beef stock to cover the meat. If you have a pressure cooker, bring to pressure and cook for 1-1.5 hours. If not, braise on low heat for 3-4 hours until meat is tender. Add the remaining coconut milk and salt to taste.
Variation: replace cumin and bay leaves with black mustard seeds and curry leaves. Fry the mustard seeds in a teaspoon of oil before adding to the pan.
I am a Manhattan-based photographer specializing in two of the best things in life: food and children.

I love the challenge and diversity of both subjects, but I most enjoy the pleasure my images -- whether mouth-watering shots of delicious dishes or tender portraits of newborn babies -- bring to my clients.

I love the creative process of turning a concept into a reality. I typically do my own food and prop styling and love every part of a shoot, from talking to the client about their needs, to developing a vision for the shoot. I love finding the perfect props to support the vision, shopping for the best ingredients, and cooking, styling and shooting a dish in a way that best communicates the vision.

My work can be seen regularly in The New York Times Dining Section, numerous cookbooks, magazines and in the marketing materials of many private clients.

For more information about my food photography, please see www.sabrakrock.com. For additional information about kids photography, please see www.sabrakrockkids.com.

Thursday, August 03, 2006

Rustic fig tart


I've been taking a pastry class at the Institute of Culinary Education which has inspired a lot of weekend pastry making. Pastry is the one major hole in my dessert repertoire; I can do cookies, cakes and cupcakes without issue but I've never mastered the art of pastry making so this is my chance. During the first session we learned two basic doughs which offer endless possibilities: pâte brisée, (a flaky dough), and pâte sucrée, a sweet and slightly dense pastry dough. The former is a little tricky for a few reasons: 1) it requires quick work to keep the dough from becoming warm, melting the butter and losing its eventual flakiness 2) it needs to be kneeded without overworking it lest it become tough and 3) it can’t be patched well and needs to be rolled out only once.

There is so much gorgeous fruit in farmers markets now I was inspired to try a fig tart with beautiful fresh figs. I used my class dough recipe and some simple instructions for making a fig tart adapted from one of my favorite seasonal cookbooks.

For the dough (makes 1 1-crust pie)

1 ¼ cups (about 5 ½ ounces) all-purpose unbleached flour
¼ teaspoon salt
1/8 teaspoon baking powder
8 tablespoons (1 stick) cold unsalted butter
2 to 3 tablespoons cold water (put ice cubes in glass of cold water to chill)

For the filling

6 tablespoons sugar or less if fruit is quite ripe
1/5 lbs fresh figs

To make the dough

Combine flour, salt and baking powder in a medium mixing bowl and whisk to mix. Pour mixture onto a clean, smooth surface such as a stainless steel table. Cut butter into tablespoon-sized pieces and add to dry ingredients. Toss once or twice to coat pieces of butter. Use your hands to rub the butter into the dry ingredients by breaking it into tiny pieces, continuously pinching and squeezing it into the dry ingredients. Be careful to keep the mixture uniform by occasionally reaching down to the bottom of the mixture and mixing all the ingredients evenly together. Continue rubbing the butter into the dry ingredients until the pieces of butter are dime/nickel-sized. Create a well in the center of the dough, spoon 2 tablespoons of the water into the hole, and mix gently with your fingertips, gradually working the water into the dry ingredients. The mixture will crumbly in the beginning but should begin to come together into a ball. If the mixture still appears crumbly after working it, add the remaining water (plus more if needed after mixing together), 1 teaspoon at a time, until the dough holds together easily. (Note: too little water makes a flaky crust that will crack during rolling; too much water makes an elastic, bread-like crust that lacks flakiness. Do not over-work the dough or it will become tough.) When finished, you should have a ball of dough with small pieces of butter still visible in the mixture. Wrap dough in plastic wrap and press it into a 6 inch disk. Refrigerate until firm, or until you are ready to use it, at least 1 hour.

To make the tart

Clean and dry work surface. Dust lightly with flour. Wipe rolling pin clean. Dust lightly with flour. Pound dough with rolling pin in two directions so it begins to spread out then roll dough into a ~9 inch disk by rolling in one direction (away from you), turning dough 90 degrees and rolling away from you again. Repeat process until you have a 1/8 inch think disc, dusting more flour under dough and on rolling pin if it sticks.

Trace a ~9 inch circle in dough using the bottom of a tart pan as a guide. Quarter figs through the stem or, if large, cut them in sixths. Set aside in a bowl. Just before you are ready to assemble galettes, sprinkle figs with 6 tablespoons of sugar and toss gently to distribute. Transfer dough to a heavy baking sheet. Arrange figs attractively on dough, leaving a 1 ½ inch edge all the way around. Fold the edge over to create a border making sure there are no cracks in the dough or the fruit juices will seep out during baking. Patch, if necessary, with bits of trimmed dough lightly moistened with cold water.

Brush border with a little egg wash (1 yolk lightly beaten with a pinch of salt), then sprinkle the border generously with sugar. Bake at 425 degrees until crust is golden and fruit is bubbly, 22 to 25 minutes. Transfer to a rack and cool slightly before serving.

Variations:
Make several individual tarts instead of one large tart

Tuesday, July 25, 2006

Fruit pops


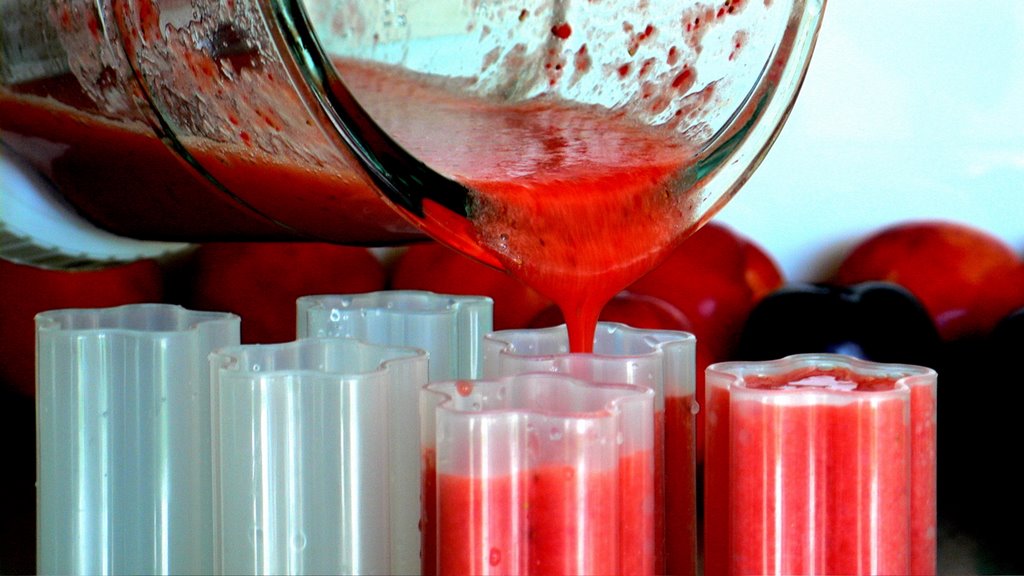
Filling the molds with strawberry-lemon fruit mix

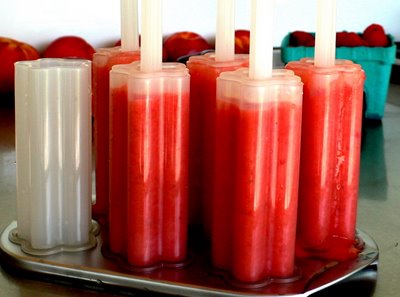
Okay, so this isn't really a recipe since it is so simple but let's call it an idea / inspiration for these hot summer days. We had a 3-year-old over this weekend which motivated me to whip up some fruit pops (strawberry-lemon, raspberry-lime and banana). They are so easy I'm not going to write a formal recipe but rather list the ingredients and provide some guidance: fresh summer fruit (whatever your fancy), water, sugar (not too much), and maybe some citrus juice or something else (mint?) for additional flavor. Combine in a blender, pour into molds and freeze for 3 hours to overnight. In terms of molds, Cuisipro has some of the cutest you've ever seen including these star pop-up molds which don't even require additional wooden popsicle sticks; they come with their own plastic sticks as part of the mold design which you can pop in the dish washer and use again and again.

I tried these with uncooked macerated berries as well as tried bringing them to a boil with water and sugar first and then blending. The latter process seemed to work particularly well to bring out the flavors in raspberries. You can add yogurt to make a creamier pop (and swirl or stack flavors if you really want to go crazy) or keep it plain and simple. I could lie and tell you that our little guest devoured them but I think he was somewhat disappointed that he was not getting sugary ice cream and instead got disguised fruit. But we adults were very happy!

Ready for the freezer!

Note: photos courtesy of the toddler's dad who has a nifty little digital camera!